Can You Eat Raw Cookie Dough? 10 Alarming Risks & Safe Alternatives

A bowl of freshly mixed cookie dough with chocolate chips and a wooden spoon on a rustic wooden counter

Have you ever craved the sweet, buttery taste of raw cookie dough and wondered, “Can you eat raw cookie dough?” You’re not alone. Many people enjoy the delectable flavor of cookie dough straight from the bowl, but is it truly safe?

This article delves into the potential risks of consuming raw cookie dough and offers safe alternatives to satisfy your sweet tooth without compromising your health. If you’re looking for easy and safe baking ideas, check out this guide on the easiest things to bake.
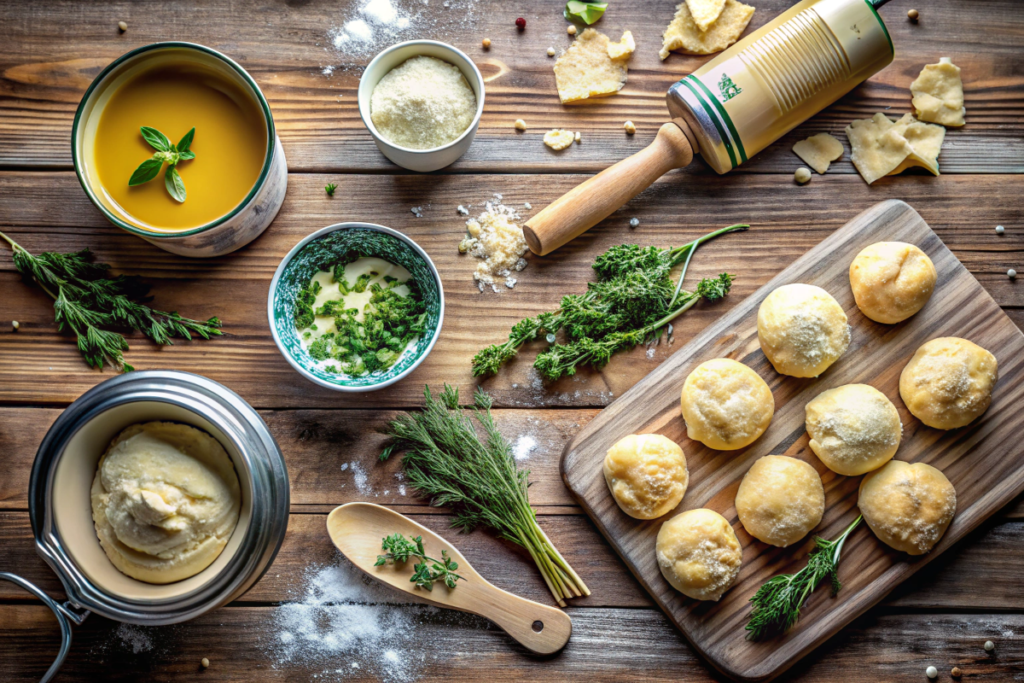
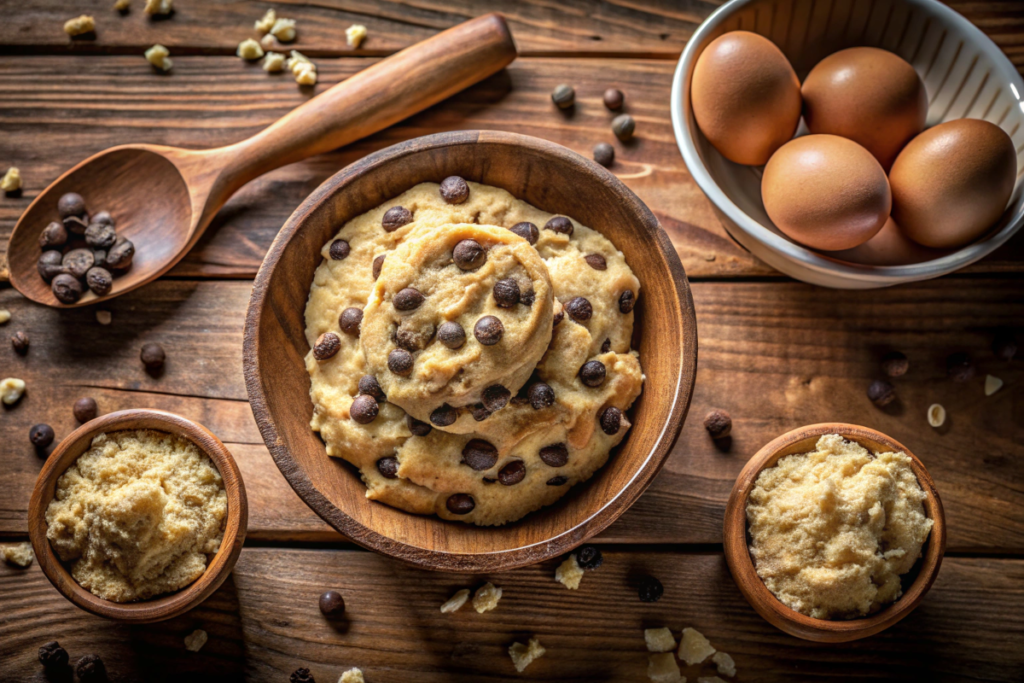
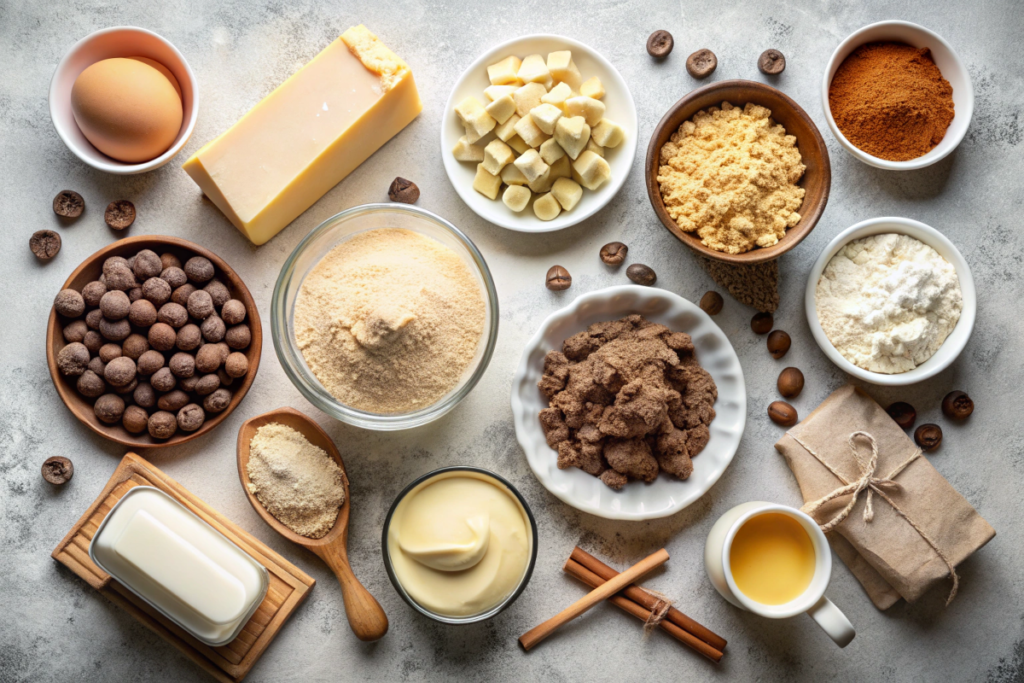
Raw cookie dough is a mixture of ingredients used to make cookies that haven’t been baked yet. Typically, it includes flour, sugar, butter, eggs, and flavorings like vanilla extract and chocolate chips. While the allure of creamy, unbaked dough is strong, it’s essential to understand what makes it potentially unsafe.

Why Can’t You Eat Raw Flour?

The Hidden Danger in Uncooked Flour

One of the primary reasons can you eat raw cookie dough is concerning is the presence of raw flour. Why can’t you eat raw flour? Flour can harbor harmful bacteria like E. coli, which can cause severe foodborne illnesses. These bacteria are typically killed during the baking process, but consuming raw flour bypasses this safety step.

  • Raw Flour Risk: Studies have found that raw flour can be contaminated with E. coli, making it unsafe to consume without proper treatment.
  • Symptoms of E. coli Infection: Include stomach cramps, diarrhea, and vomiting, which can be severe and require medical attention.

Salmonella and Other Health Risks

Another concern with raw cookie dough is the use of raw eggs. Why can’t you eat raw cookie dough? Raw eggs can be contaminated with Salmonella bacteria, leading to food poisoning.

  • Salmonella Risk: Consuming raw eggs can result in Salmonella infection, causing symptoms like fever, abdominal cramps, and diarrhea.
  • Vulnerable Groups: Young children, the elderly, pregnant women, and individuals with weakened immune systems are particularly at risk.

Assessing the Safety of Consuming Raw Dough

So, can you eat cookie dough? While the taste might be irresistible, eating raw cookie dough carries significant health risks due to the presence of raw flour and eggs. It’s essential to weigh the enjoyment against the potential dangers to your health.

Understanding the Impact of Removing Eggs on Raw Cookie Dough Safety

Many cookie dough enthusiasts wonder, “Can you eat raw cookie dough if it’s egg-free?” Removing eggs from cookie dough can significantly reduce certain health risks, but it doesn’t automatically make the dough entirely safe to consume raw. Here’s a detailed look into how eliminating eggs affects the safety of raw cookie dough and what additional precautions you should take.

The Role of Eggs in Raw Cookie Dough Safety

Raw eggs are a common ingredient in traditional cookie dough recipes. They can harbor Salmonella bacteria, which poses a serious risk of foodborne illness when consumed raw. By removing eggs or substituting them with pasteurized alternatives, you eliminate the primary source of Salmonella contamination. However, this is just one part of ensuring that your raw cookie dough is safe to eat.

Benefits of Egg-Free Raw Cookie Dough

  1. Reduced Risk of Salmonella: Without raw eggs, the likelihood of Salmonella infection decreases significantly. This makes egg-free raw cookie dough a safer option for those who crave the taste without the associated health risks.
  2. Dietary Flexibility: Egg-free cookie dough caters to individuals with egg allergies or those following a vegan diet, broadening the accessibility of this beloved treat.
  3. Texture and Flavor: Substituting eggs can still yield a deliciously creamy and rich cookie dough, maintaining the enjoyable texture and flavor without compromising safety.

Remaining Risks Without Eggs

While removing eggs addresses the risk of Salmonella, other factors still need attention to ensure the raw cookie dough is safe:

  1. Raw Flour Risk: Raw flour can contain harmful bacteria like E. coli. Just like eggs, flour is a raw agricultural product that hasn’t been treated to kill pathogens. Consuming raw flour, even in egg-free dough, can still lead to severe foodborne illnesses.
  2. Cross-Contamination: Handling raw cookie dough without proper hygiene can introduce other bacteria from surfaces, utensils, or hands, increasing the risk of contamination.
  3. Other Ingredients: Ingredients like butter and dairy products can also pose risks if not properly handled or pasteurized.

Making Egg-Free Raw Cookie Dough Safer

To fully enjoy raw cookie dough safely, especially when it’s egg-free, consider the following steps:

  1. Heat-Treat the Flour: Spread the flour on a baking sheet and bake it at 350°F (175°C) for about 5 minutes. This process kills any harmful bacteria present in the flour, making it safe to consume raw.
  2. Use Pasteurized Egg Substitutes: If you prefer not to use eggs, opt for pasteurized egg substitutes available in stores. These alternatives mimic the binding properties of eggs without the associated health risks.
  3. Incorporate Safe Ingredients: Choose high-quality, pasteurized dairy products and ensure all add-ins like chocolate chips are safe for raw consumption.
  4. Maintain Cleanliness: Always wash your hands, utensils, and surfaces thoroughly when handling raw cookie dough to prevent cross-contamination.

Evaluating the Risks vs. Benefits

Is cookie dough safe to eat? In its traditional form, raw cookie dough is not safe due to the reasons mentioned above. However, with modifications, you can enjoy edible cookie dough that eliminates these risks.

  • Edible Cookie Dough: Made without raw eggs and with heat-treated flour, making it safe to consume without baking.

Understanding the Immediate Effects

Eating raw cookie dough can lead to immediate health issues, primarily due to the ingestion of harmful bacteria.

  • Food Poisoning Symptoms: Include nausea, vomiting, diarrhea, and stomach cramps.
  • Severity: In some cases, infections can be severe and require hospitalization.

Ingredients in Cookies That Can Cause Foodborne Illness

Identifying Hazardous Components

Several ingredients in cookie dough can pose health risks when consumed raw:

  • Flour: Potential contamination with E. coli.
  • Eggs: Risk of Salmonella infection.
  • Butter and Dairy: Can harbor Listeria and other bacteria if not pasteurized.

Understanding these risks helps in making informed decisions about consuming raw dough.

Debunking Brand-Specific Concerns

Many popular brands, including Nestle, offer raw cookie dough products. Is it really unsafe to eat Nestle raw cookie dough? Nestle has introduced edible cookie dough options that are safe to eat, as they remove raw eggs and use heat-treated flour. Always check the packaging to ensure you’re consuming a safe-to-eat version.

The Compelling Reasons to Avoid It

The health risks associated with eating raw cookie dough far outweigh the temporary pleasure of consuming it.

  • Health Risks: Exposure to harmful bacteria like E. coli and Salmonella.
  • Long-Term Effects: Potential for severe illnesses and complications, especially in vulnerable populations.

Transforming Raw Dough into Delicious Baked Goods

Instead of eating raw dough, consider baking it to eliminate health risks. How to reheat cookie dough safely involves transforming it into baked cookies where harmful bacteria are destroyed.

  • Baking Instructions: Preheat oven to 350°F (175°C) and bake for 10-12 minutes until golden brown.

Understanding the Differences

Safe-to-eat cookie dough is specifically formulated to be consumed raw, unlike regular dough, which requires baking.

  • Safe-to-Eat Dough: No raw eggs, heat-treated flour, and often includes edible ingredients.
  • Regular Dough: Contains raw eggs and untreated flour, making it unsafe to eat raw.
Can you eat raw cookie dough ? those Ingredients for making edible cookie dough, including heat-treated flour, butter, brown sugar, vanilla extract, chocolate chips, and milk.

A Step-by-Step Guide for Safe Consumption

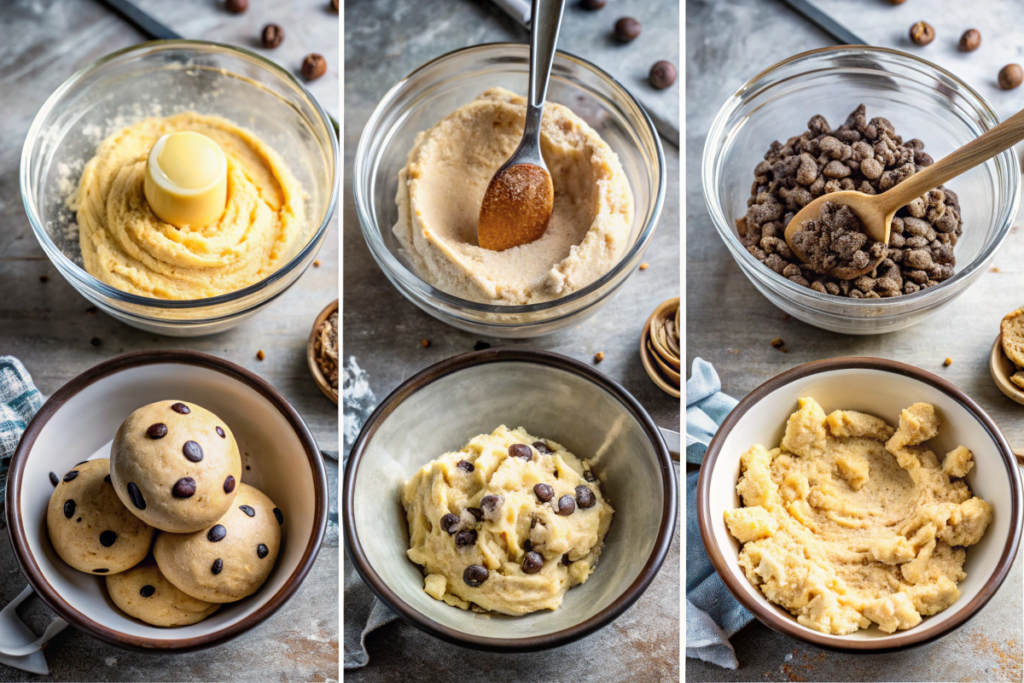
Creating edible cookie dough at home is simple and allows you to enjoy the taste without the risks.

Ingredients:

  • 1 cup heat-treated flour
  • 1/2 cup unsalted butter, softened
  • 1/2 cup brown sugar
  • 1/4 cup granulated sugar
  • 2 tablespoons milk
  • 1 teaspoon vanilla extract
  • 1/2 cup chocolate chips

Instructions:

  1. Heat-Treat the Flour: Spread the flour on a baking sheet and bake at 350°F (175°C) for 5 minutes to kill any bacteria. Let it cool completely.
  2. Cream the Butter and Sugars: In a large bowl, beat the softened butter, brown sugar, and granulated sugar until creamy.
  3. Add Milk and Vanilla: Mix in the milk and vanilla extract until well combined.
  4. Combine with Flour: Gradually add the heat-treated flour, mixing until the dough is smooth.
  5. Fold in Chocolate Chips: Stir in the chocolate chips.
  6. Chill: Refrigerate for at least 30 minutes before serving to enhance flavor and texture.

Enjoy your edible cookie dough safely without the associated health risks.

A three-step collage showing the process of making edible cookie dough: heat-treating flour, mixing ingredients, and folding in chocolate chips.

Exploring Store-Bought Options

Yes, you can buy pre-made safe-to-eat cookie dough from various brands. These products are specifically designed to be consumed raw, eliminating the need for baking.

  • Popular Brands: Include Nestle Toll House Edible Cookie Dough, Pillsbury Edible Cookie Dough, and others.
  • Ingredients: Typically free from raw eggs and use heat-treated flour to ensure safety.

Always read labels to confirm that the product is safe to eat raw.

Choosing Safer Flour Options

If you’re concerned about raw flour risks, consider using safer alternatives in your cookie dough.

  • Heat-Treated Flour: Easily made at home or available for purchase, ensures bacteria are eliminated.
  • Almond Flour: A gluten-free option that is safe to eat raw.
  • Oat Flour: Another gluten-free alternative that can be safely consumed raw.

These alternatives reduce the risk associated with traditional raw flour.

How to Heat-Treat Flour at Home

Simple Methods to Ensure Safety

You can easily heat-treat flour at home to make it safe for consumption.

Oven Method:

  1. Spread Flour: Evenly spread 1 cup of flour on a baking sheet.
  2. Bake: Bake at 350°F (175°C) for 5 minutes.
  3. Cool: Let it cool completely before using in recipes.

Microwave Method:

  1. Spread Flour: Place 2 tablespoons of flour in a microwave-safe bowl.
  2. Heat: Microwave on high for 30 seconds.
  3. Stir and Repeat: Stir and heat in 15-second intervals until warm.

These methods ensure that your flour is free from harmful bacteria.

Debunking Misconceptions

There are several myths surrounding the consumption of raw cookie dough. Let’s debunk some common ones.

  • Myth 1: Raw cookie dough is completely safe.
    • Truth: Traditional raw dough contains ingredients that can be harmful.
  • Myth 2: Freezing raw dough makes it safe to eat.
    • Truth: Freezing does not kill bacteria; baking is necessary.
  • Myth 3: All cookie dough is the same in terms of safety.
    • Truth: Only specially formulated edible cookie dough is safe to consume raw.

Understanding the facts helps in making informed choices about consuming raw dough.

What Are the Symptoms of Food Poisoning from Raw Dough?

Recognizing the Signs of Illness

Consuming raw cookie dough can lead to foodborne illnesses. Here are the symptoms to watch for:

  • Nausea and Vomiting: Often the first signs of food poisoning.
  • Diarrhea: Can be severe and lead to dehydration.
  • Stomach Cramps: Intense abdominal pain is common.
  • Fever: A natural response to infection.
  • Headache and Muscle Pain: May accompany other symptoms.

If you experience these symptoms after eating raw dough, seek medical attention immediately.

FAQs About Eating Raw Cookie Dough

Can I freeze raw cookie dough?

Yes, store it in an airtight container for up to three months.

How long does raw cookie dough last in the fridge?

It stays fresh for about 3-5 days when properly stored.

Can I bake frozen cookie dough?

Yes, bake it straight from frozen with a few extra minutes.

What are egg substitutes for raw cookie dough?

Use milk, applesauce, or yogurt instead of eggs.

Conclusion

The question “Can you eat raw cookie dough?” carries significant health implications. While the taste and texture might be tempting, the risks associated with raw flour and eggs cannot be ignored. However, with safe alternatives and proper preparation, you can enjoy delicious, edible cookie dough without compromising your health.

By understanding the dangers, making informed choices, and exploring safe-to-eat options, you can satisfy your cookie dough cravings safely. Always prioritize your health and opt for methods that eliminate harmful bacteria, ensuring every bite is both delightful and safe.

Happy baking and enjoy your safe, delicious cookie dough!

Air Fryer Biscuits Pillsbury: A Game-Changer for Quick and Delicious Snacks

A basket of golden-brown air fryer Pillsbury biscuits with butter and jam on the side

Are you tired of waiting for your oven to preheat or dealing with the mess of traditional baking? Air fryer biscuits Pillsbury offer a revolutionary way to enjoy warm, flaky biscuits in a fraction of the time. Whether you’re preparing a quick breakfast, a hearty lunch, or a comforting dinner, these air fryer Pillsbury biscuits are a convenient and delicious option.

In this comprehensive guide, we’ll delve into why air fryer Pillsbury biscuits are a game-changer, how to make them perfectly every time, and explore various flavor and serving ideas to elevate your biscuit experience. If you want more info on cooking canned biscuits, check out this guide .

What Are Air Fryer Biscuits Pillsbury?

Definition and Appeal of This Versatile Dish

Pillsbury flaky biscuits air fryer refers to Pillsbury’s ready-to-bake biscuit dough cooked using an air fryer instead of a traditional oven. This method not only speeds up the cooking process but also ensures a perfectly crispy exterior while maintaining a soft and fluffy interior. The appeal of air fryer biscuits Pillsbury lies in their ease of preparation, consistent results, and the ability to customize flavors and fillings to suit any meal or occasion.

Benefits of Using an Air Fryer for Pillsbury Biscuits

Quicker Cooking, Even Baking, and Crispy Exteriors

Choosing to bake air fryer Pillsbury biscuits instead of using a conventional oven offers numerous advantages:

  • Quicker Cooking: Air fryers heat up rapidly and cook biscuits in a shorter time, perfect for busy mornings or last-minute gatherings.
  • Even Baking: The rapid air circulation ensures that biscuits bake evenly, preventing undercooked centers and burnt edges.
  • Crispy Exteriors: Achieve a delightful crunch on the outside while keeping the inside tender and flaky, enhancing the overall texture of the biscuits.
  • Energy Efficiency: Air fryers consume less energy compared to traditional ovens, making them a more environmentally friendly option.
  • Less Heat in the Kitchen: Especially beneficial during warmer months, using an air fryer minimizes the additional heat generated in your kitchen.

These benefits make air fryer Pillsbury biscuits an excellent choice for anyone seeking a faster, more efficient, and consistently delicious baking method.

What Are Pillsbury Biscuits?

A Brief Overview of Pillsbury Biscuits and Their Variety

Pillsbury biscuits are renowned for their flaky texture and rich flavor, making them a staple in many households. Available in various forms such as refrigerated dough, biscuits in a can, and fully baked options, Pillsbury offers a range of biscuits to cater to different preferences and needs. From classic buttery biscuits to flavored varieties like garlic herb and cinnamon sugar, Pillsbury biscuits air fryer recipes allow you to enjoy these versatile treats with minimal effort and maximum flavor.

Ingredients for Air Fryer Pillsbury Biscuits

Basic Ingredients and Optional Add-ins

Creating homemade Pillsbury biscuits air fryer is straightforward and requires only a few essential ingredients:

  • Pillsbury Biscuit Dough: Choose your preferred type, whether it’s original, garlic herb, or cinnamon sugar.
  • Non-Stick Cooking Spray: To lightly coat the air fryer basket and prevent sticking without adding extra oil.
  • Optional Add-ins: Enhance your biscuits with ingredients like shredded cheese, chopped herbs, or a drizzle of honey for added flavor.

These simple ingredients ensure that you can whip up a batch of delicious air fryer biscuits Pillsbury in no time, perfect for any meal or snack.

Ingredients for air fryer Pillsbury biscuits, including biscuit dough, butter, and herbs

Choosing the Best Tortillas

Flour, Corn, Whole Wheat, and Gluten-Free Options

While air fryer biscuits Pillsbury primarily focus on biscuit dough, choosing the right type of tortilla or biscuit can impact the final texture and flavor:

  • Flour Biscuits: Soft and pliable, ideal for creating classic, fluffy biscuits.
  • Corn Biscuits: Offer a slightly different flavor and a more robust texture, perfect for those who prefer a heartier biscuit.
  • Whole Wheat Biscuits: A healthier alternative that provides more fiber and nutrients without compromising on taste.
  • Gluten-Free Biscuits: Made from alternative flours like almond or rice, catering to those with dietary restrictions while still delivering delicious results.

Selecting the right biscuit type allows you to customize your air fryer healthy tortilla wraps to meet your dietary needs and flavor preferences.

Step-by-Step Guide to Making Air Fryer Tortilla Wraps

Detailed Cooking Instructions for Perfect Results

Follow these simple steps to create perfect air fryer biscuits Pillsbury every time:

Prepare the Biscuit Dough

  1. Unwrap the Dough: Remove the Pillsbury biscuit dough from the packaging and separate the biscuits.
  2. Optional Enhancements: If desired, add shredded cheese, chopped herbs, or a drizzle of honey on top of each biscuit for extra flavor.

Preheat the Air Fryer

  1. Set the Temperature: Preheat your air fryer to 350°F (175°C) for about 3 minutes to ensure even cooking.
  2. Prepare the Basket: Lightly spray the air fryer basket with non-stick cooking spray to prevent sticking.

Arrange the Biscuits

  1. Place the Biscuits: Arrange the Pillsbury biscuits in a single layer in the air fryer basket, ensuring they do not overlap.
  2. Leave Space: Allow enough space between each biscuit for air to circulate, promoting even baking.

Air Fry the Biscuits

  1. Cook Time: Air fry the biscuits for 8-10 minutes, flipping them halfway through the cooking time to ensure both sides are golden brown and crispy.
  2. Check for Doneness: The biscuits should be puffed up with a crispy exterior and a soft, flaky interior. If they need more time, cook for an additional 1-2 minutes.

Serve and Enjoy

  1. Cool Slightly: Allow the biscuits to cool for a few minutes to firm up before serving.
  2. Enjoy: Serve your air fryer biscuits Pillsbury warm with butter, jam, or your favorite breakfast spreads.

Tips:

  • Uniform Cutting: Ensure all biscuits are of similar size for even cooking.
  • Even Seasoning: Apply seasonings evenly to enhance the flavor of each biscuit.

Best Temperature and Timing for Fluffy Biscuits

Guidelines to Achieve a Perfect Bake

Achieving perfectly baked air fryer biscuits Pillsbury requires precise temperature and timing:

  • Temperature: Set your air fryer to 350°F (175°C) to allow the biscuits to rise and cook through without burning.
  • Timing: Bake the biscuits for 8-10 minutes. Start checking at the 8-minute mark to prevent overcooking. Depending on your air fryer model, you may need to adjust the time slightly.
  • Flipping: Flip the biscuits halfway through the cooking process to ensure both sides are evenly baked and crispy.
  • Monitoring: Keep an eye on the biscuits towards the end of the cooking time to achieve a golden-brown color without burning.

Following these guidelines ensures that your air fryer fluffy Pillsbury biscuits come out perfectly every time, with a delightful balance of crispy exteriors and soft, flaky interiors.

Seasoning Ideas for Oil-Free Tortilla Chips

Sweet, Savory, and Spicy Flavor Variations

Enhance the flavor of your air fryer biscuits Pillsbury with a variety of seasoning options:

  • Sweet Variations:
    • Cinnamon Sugar: Mix cinnamon and sugar for a sweet and warm flavor profile.
    • Honey Drizzle: Lightly drizzle honey over the biscuits before cooking for added sweetness.
  • Savory Variations:
    • Garlic Herb: Sprinkle garlic powder and dried herbs like rosemary or thyme for a savory taste.
    • Parmesan Cheese: Add grated Parmesan cheese for a rich, cheesy flavor.
  • Spicy Variations:
    • Chili Powder: Sprinkle chili powder for a spicy kick.
    • Paprika: Use smoked paprika for a smoky and flavorful twist.
  • Combination Flavors:
    • Sweet and Savory: Combine honey and garlic powder for a balanced flavor.
    • Spicy and Cheesy: Mix chili powder with Parmesan for a spicy and cheesy biscuit.

These seasoning ideas allow you to customize your air fryer Pillsbury biscuits to suit any taste preference, making them versatile enough for both sweet and savory dishes.

How to Enhance Pillsbury Biscuits

Adding Cheese, Butter, or Garlic for Extra Flavor

Take your air fryer biscuits Pillsbury to the next level by incorporating additional flavor enhancers:

  • Cheese: Sprinkle shredded cheese like cheddar, mozzarella, or Parmesan on top of each biscuit before air frying for a melty and savory addition.
  • Butter: Brush the biscuits with melted butter or a butter alternative before cooking to add richness and enhance crispiness.
  • Garlic: Add a sprinkle of garlic powder or minced garlic to the biscuit dough for a robust and aromatic flavor.
  • Herbs: Incorporate fresh or dried herbs like rosemary, thyme, or oregano into the seasoning for an herbal twist.
  • Sweet Toppings: For a sweet variation, drizzle a little honey or maple syrup over the biscuits before cooking and sprinkle with cinnamon sugar.

These enhancements not only add depth to the flavor but also create a more satisfying and delicious biscuit experience.

Nutritional Information and Health Benefits

Calorie Count, Portion Sizes, and Healthier Tweaks

Understanding the nutritional aspects of air fryer biscuits Pillsbury helps you make informed dietary choices:

  • Calories: A standard Pillsbury biscuit typically contains around 160-200 calories, depending on the type and size. Using an air fryer can help reduce calorie intake by minimizing added fats.
  • Fat Content: Air frying requires less oil, significantly lowering the fat content compared to traditional frying methods.
  • Carbohydrates: Pillsbury biscuits provide a good source of carbohydrates, essential for energy. Opting for whole wheat tortillas increases fiber intake, promoting satiety and digestive health.
  • Protein: While not high in protein, adding ingredients like cheese or lean meats can boost the protein content, making the biscuits more balanced.
  • Vitamins and Minerals: Pillsbury biscuits contain essential vitamins and minerals like calcium and iron. Adding vegetables or cheese can enhance their nutritional value further.
  • Healthier Tweaks:
    • Whole Wheat Tortillas: Use whole wheat or high-fiber tortillas to increase the nutritional content.
    • Low-Fat Cheese: Opt for low-fat or reduced-fat cheese to decrease calorie and fat intake.
    • Lean Fillings: Incorporate lean proteins like grilled chicken or tofu to add protein without excessive calories.

These nutritional insights make air fryer healthy tortilla wraps a balanced and satisfying snack option that aligns with various dietary goals.

Serving Ideas for Air Fryer Biscuits

Breakfast Sandwiches, Snacks, and Side Dishes

Maximize the versatility of your air fryer biscuits Pillsbury with a variety of serving ideas:

  • Breakfast Sandwiches:
    • Egg and Cheese: Split the biscuit and fill with a scrambled egg and a slice of cheese for a quick breakfast.
    • Bacon and Avocado: Add crispy bacon and avocado slices for a hearty and flavorful sandwich.
  • Snacks:
    • Dipping Biscuits: Serve with honey, jam, or a savory dip like hummus or ranch dressing.
    • Mini Biscuits: Cut the biscuits into smaller pieces and serve as bite-sized snacks with various toppings.
  • Side Dishes:
    • Biscuits with Soups: Pair warm biscuits with a bowl of soup or stew for a comforting meal.
    • Salad Accompaniment: Use biscuits as a crunchy side to complement fresh salads.
  • Appetizers:
    • Stuffed Biscuits: Fill biscuits with cheese, spinach, or other ingredients for delicious appetizers.
    • Bruschetta Style: Top biscuits with diced tomatoes, basil, and mozzarella for a fresh appetizer.

These serving ideas enhance the enjoyment of air fryer biscuits Pillsbury, making them suitable for any meal or occasion.

Storing and Reheating Air Fryer Biscuits

Tips to Keep Them Fresh and Crispy

Proper storage and reheating ensure that your air fryer biscuits Pillsbury remain delicious and enjoyable:

  • Storing:
    • Airtight Container: Keep biscuits in an airtight container to maintain their crispness and prevent moisture from making them soggy.
    • Cool, Dry Place: Store the container in a cool, dry area away from direct sunlight to preserve freshness.
    • Avoid Refrigeration: Refrigerating can introduce moisture, making the biscuits less crispy. Store them at room temperature instead.
  • Reheating:
    • Air Fryer: Reheat at 350°F (175°C) for 2-3 minutes to restore crispiness without drying out the biscuits.
    • Oven: Place biscuits on a baking sheet and heat in a preheated oven at 350°F (175°C) for about 5 minutes.
    • Microwave: While not ideal for maintaining crispness, you can microwave for 15-20 seconds and then air fry or bake to regain crunch.

Following these tips ensures that your air fryer no oil crispy tortilla snack remains fresh and tasty, even after storage.

Comparing Air Fryer vs. Oven-Baked Pillsbury Biscuits

Taste, Texture, and Time Differences

When deciding between air frying and oven baking Pillsbury biscuits, consider the following differences:

  • Taste:
    • Air Fryer: Produces a slightly crispier exterior with a tender interior, enhancing the flaky texture.
    • Oven: Offers a more traditional, evenly baked biscuit flavor but may lack the extra crispiness achieved by air frying.
  • Texture:
    • Air Fryer: Results in a crispier outer layer while maintaining a soft and fluffy inside.
    • Oven: Provides a consistent texture throughout but might not achieve the same level of crispiness.
  • Time:
    • Air Fryer: Cooks biscuits faster, typically in 8-10 minutes, making it ideal for quick meals.
    • Oven: Takes longer, usually around 12-15 minutes, which may not be suitable for last-minute preparations.
  • Convenience:
    • Air Fryer: More energy-efficient and quicker, perfect for those who need to prepare snacks rapidly.
    • Oven: Better for baking larger batches at once, especially if you’re preparing multiple dishes.

Choosing between air frying and oven baking depends on your time constraints and desired texture. Air fryer biscuits Pillsbury offer a quicker and crispier alternative, while oven-baked biscuits provide a more traditional taste and texture.

Creative Uses for Leftover Pillsbury Biscuits

Turn Them into Sliders, Bread Pudding, or Croutons

Don’t let leftover air fryer biscuits Pillsbury go to waste! Here are some creative ways to repurpose your biscuits:

  • Sliders: Slice biscuits in half and fill them with mini burgers, pulled pork, or your favorite sandwich fillings for delicious sliders.
  • Bread Pudding: Cut biscuits into cubes and use them as the base for a sweet or savory bread pudding, perfect for breakfast or dessert.
  • Croutons: Cube the biscuits and toss them with olive oil and seasonings, then air fry again until crispy. Use them as croutons for salads or soups.
  • Breakfast Casserole: Layer biscuits with eggs, cheese, and vegetables to create a hearty breakfast casserole.
  • Stuffed Biscuits: Fill biscuits with cheese, spinach, or other ingredients, then air fry to create stuffed appetizers or snacks.
  • Dessert Topping: Crush sweet biscuits and sprinkle them over ice cream or yogurt for added texture and flavor.

These creative uses ensure that every biscuit is enjoyed to its fullest potential, adding variety and excitement to your meals.

FAQs About Pillsbury Biscuits In Air Fryer

Can I make all types of Pillsbury biscuits in the air fryer?

Yes, most types of Pillsbury biscuits, including original, garlic herb, and cinnamon sugar, can be made in the air fryer. Adjust the cooking time and temperature based on the specific type and size of the biscuits.

Do I need to use oil when air frying Pillsbury biscuits?

No, you can make air fryer biscuits Pillsbury without oil by using non-stick cooking spray or parchment paper to prevent sticking. However, a light spray of oil can enhance crispiness if desired.

How do I prevent my biscuits from sticking to the air fryer basket?

Use a light spray of non-stick cooking spray or line the air fryer basket with perforated parchment paper. This ensures that the biscuits cook evenly without sticking.

Can I reheat air-fried Pillsbury biscuits?

Absolutely! Reheat them in the air fryer at 350°F (175°C) for 2-3 minutes to restore their crispiness. Alternatively, you can use a microwave followed by a quick air fry to regain texture.

Conclusion

Air fryer biscuits Pillsbury are a revolutionary way to enjoy warm, flaky biscuits with minimal effort and maximum flavor. By leveraging the benefits of air frying—such as quicker cooking times, even baking, and crispy exteriors—you can create delicious and healthy biscuits that cater to any meal or occasion. Whether you prefer sweet, savory, or herbed flavors, these air fryer Pillsbury biscuits offer endless customization possibilities to suit your taste preferences and dietary needs.

By following our step-by-step guide, selecting the best ingredients, and experimenting with various seasoning and filling options, you can master the art of making perfect air fryer biscuits Pillsbury every time. Additionally, with creative serving ideas and effective storage tips, you can enjoy these biscuits fresh and crispy even days after making them.

Embrace the simplicity and health benefits of air frying, and enjoy the delightful crunch and flaky texture of air fryer biscuits Pillsbury as a staple in your kitchen. Whether you’re a seasoned air fryer enthusiast or a beginner looking to explore new recipes, this easy and versatile snack is sure to become a favorite.

Happy baking!

Flour Tortilla Chips Oven: A Healthy and Crispy Snack Alternative

A basket of golden, crispy oven-baked tortilla chips served with dips

Flour tortilla chips baked in the oven are a fantastic alternative to their fried counterparts, offering a healthier, low-fat, and equally delicious snack option. Whether you’re hosting a party, enjoying a movie night, or simply craving a crunchy treat, flour tortilla chips oven provide the perfect solution.

In this comprehensive guide, we’ll explore the benefits of baking tortilla chips, the best ingredients to use, step-by-step cooking instructions, and creative ways to enjoy your homemade chips. If you’d like to try a sweet twist, check out this air fryer cinnamon sugar tortilla chips recipe.

What Makes Air Fryer Tortilla Chips Special?

Benefits of Using an Air Fryer for Chips Over Traditional Frying

Using an air fryer to make homemade flour tortilla chips oven offers several advantages over traditional frying methods:

  • Healthier Option: Air frying requires significantly less oil, reducing the fat and calorie content of your chips.
  • Less Mess: Traditional frying can be messy and requires careful handling of hot oil. Air frying is cleaner and safer.
  • Easier Cleanup: With minimal oil use, cleanup is much simpler compared to deep-frying.
  • Consistent Results: Air fryers provide even heat distribution, ensuring uniformly crispy chips every time.
  • Quick Cooking: Air fryers heat up faster and cook chips more quickly than conventional ovens.

These benefits make air fryer tortilla chips a healthier, more convenient, and mess-free alternative to traditional fried snacks.

Essential Ingredients for Oven-Baked Flour Tortilla Chips

Tortillas, Oil Alternatives, and Seasoning Options

Creating flour tortilla chips oven requires just a few simple and easy-to-find ingredients:

  • Flour Tortillas: The base of your chips. Choose high-quality tortillas for the best texture and flavor.
  • Oil Alternatives: Opt for healthier oils like olive oil, coconut oil, or avocado oil. Alternatively, use a light cooking spray to minimize added fats.
  • Seasonings: Enhance the flavor with a variety of seasonings. For sweet chips, use cinnamon and sugar. For savory chips, consider paprika, garlic powder, or chili powder.
  • Optional Add-ins: Add herbs like oregano or a pinch of salt to customize the flavor profile.

These ingredients come together to create a simple yet delicious snack that’s both easy to prepare and incredibly satisfying.

Ingredients for homemade baked tortilla chips, including flour tortillas, oil, and spices

Step-by-Step Guide to Making Flour Tortilla Chips in the Oven

Detailed Cooking Instructions

Follow these simple steps to create your own crispy tortilla chips oven recipe:

Prepare the Tortillas

  1. Choose Your Tortilla: Select your preferred type of tortilla—flour, whole wheat, or gluten-free.
  2. Cut into Shapes: Use a pizza cutter or sharp knife to cut the tortillas into triangles or your desired chip shape.

Season the Chips

  1. Lightly Spray with Oil: Lightly spray both sides of the tortilla pieces with olive oil or your chosen oil alternative. This helps the seasoning adhere and promotes crispiness.
  2. Add Seasonings: Sprinkle your chosen seasonings evenly over the tortilla pieces. For sweet chips, use a mixture of cinnamon and sugar.

Bake the Chips

  1. Preheat the Oven: Set your oven to 375°F (190°C) and let it preheat for about 5 minutes.
  2. Arrange the Chips: Place the seasoned tortilla pieces in a single layer on a baking sheet lined with parchment paper. Avoid overcrowding to ensure even cooking.
  3. Bake: Bake the chips for 10-15 minutes, flipping them halfway through the cooking time. Keep a close eye to prevent burning.
  4. Check for Doneness: The chips should be golden brown and crispy. If they need more time, bake for an additional 1-2 minutes, keeping a close watch to prevent overcooking.

Serve and Enjoy

  1. Cool Slightly: Allow the chips to cool for a few minutes to firm up.
  2. Serve: Enjoy your homemade flour tortilla chips oven with your favorite dips or as a standalone snack.

Tips:

  • Uniform Cutting: Ensure all tortilla pieces are cut to a similar size for even cooking.
  • Even Seasoning: Distribute the seasoning evenly to avoid clumping and ensure every chip is flavorful.

Perfecting the Cinnamon Sugar Mixture

Ratio and Tips for Even Coating

Creating the perfect cinnamon sugar coating is key to delicious easy baked tortilla chips. Here’s how to get it just right:

  • Balance the Flavors: Use a ratio of 1 teaspoon of cinnamon to 1 tablespoon of sugar for a balanced sweetness and spice.
  • Adjust to Taste: Feel free to adjust the cinnamon and sugar amounts based on your preference for sweetness or spice.
  • Mix Thoroughly: Ensure the cinnamon and sugar are well combined to distribute the flavors evenly across the chips.
  • Even Application: Spray the chips lightly with oil before sprinkling the cinnamon sugar mixture to help it adhere properly.

By perfecting your cinnamon sugar mixture, you can achieve a consistent and delicious flavor in every bite.

Collage of steps to bake tortilla chips, from slicing to seasoning and baking
From slicing tortillas to seasoning and baking, see how easy it is to make crispy homemade chips

Best Temperature and Timing for Perfect Chips

How to Avoid Burning or Undercooking

Achieving the ideal crunch for your flour tortilla chips oven requires precise temperature and timing:

  • Temperature: Preheat your oven to 375°F (190°C). This temperature is high enough to crisp up the chips without burning the cinnamon sugar.
  • Timing: Bake the chips for 10-15 minutes. Start checking at the 10-minute mark to prevent overcooking. Depending on your oven and the thickness of the chips, you may need to adjust the cooking time slightly.
  • Flip the Chips: Flip the chips halfway through baking to ensure even crisping on both sides.
  • Monitoring: Keep a close eye on the chips towards the end of the cooking time to achieve the perfect golden-brown color without burning.

Following these guidelines will help you create perfectly crispy and flavorful healthy tortilla chips in oven every time.

Creative Ways to Serve Cinnamon Sugar Tortilla Chips

Dessert Dips, Ice Cream Toppings, and More

Elevate your sweet tortilla chips oven by pairing them with creative accompaniments:

  • Dessert Dips:
    • Chocolate Fondue: Dip the chips in melted chocolate for a decadent treat.
    • Caramel Sauce: Drizzle caramel over the chips for a rich and sweet experience.
    • Cream Cheese Frosting: Offer a tangy contrast to the sweet chips with a creamy dip.
  • Ice Cream Toppings:
    • Vanilla Ice Cream: Crush the chips and sprinkle them over vanilla ice cream for added crunch.
    • Salted Caramel Ice Cream: Pair the sweet chips with a salty caramel flavor for a delightful balance.
  • Fruit Compote:
    • Berry Compote: Serve the chips with a warm berry compote for a fruity twist.
    • Apple Cinnamon: Create a comforting combination with apple slices and cinnamon.
  • Savory Pairings:
    • Cheese Platter: Offer the chips as part of a cheese and fruit platter for a versatile appetizer.
    • Yogurt Dip: Provide a creamy yogurt dip with a hint of honey to complement the sweet chips.

These creative serving ideas make your homemade flour tortilla chips oven even more enjoyable, turning a simple snack into a gourmet experience.

Storing and Reheating Flour Tortilla Chips

Keeping Chips Fresh and Crispy

Proper storage and reheating are essential to maintain the freshness and crunch of your homemade flour tortilla chips oven:

  • Storing:
    • Airtight Container: Store the chips in an airtight container to prevent moisture from making them soggy.
    • Cool, Dry Place: Keep the container in a cool, dry place away from direct sunlight to maintain the chips’ crispiness.
    • Avoid Refrigeration: Refrigerating can introduce moisture, making the chips less crispy. Store them at room temperature instead.
  • Reheating:
    • Oven: Preheat your oven to 350°F (175°C). Spread the chips on a baking sheet and heat for 5-7 minutes until crispy.
    • Air Fryer: If you have an air fryer, reheat the chips at 350°F (175°C) for 2-3 minutes to restore their crunchiness.
    • Microwave: While not ideal for maintaining crispiness, you can microwave the chips for 15-20 seconds and then air fry or bake to regain crunch.

By following these storage and reheating tips, you can enjoy your flour tortilla chips oven at their best, even days after making them.

Benefits of Air Fryer Cooking for Weight Watchers

Lower Oil Consumption, Calorie Control, and Quick Cooking

Using an air fryer to prepare flour tortilla chips oven offers several benefits that align perfectly with Weight Watchers’ principles:

  • Lower Oil Consumption: Air frying uses significantly less oil than traditional frying methods, reducing the overall fat and calorie content of your snacks.
  • Calorie Control: With precise control over cooking times and temperatures, you can manage the calorie intake of your snacks more effectively.
  • Quick Cooking: Air fryers cook food faster than conventional ovens, making it easy to prepare healthy snacks on the go.
  • Versatility: Beyond chips, air fryers can be used to cook a wide range of low-point snacks and meals, enhancing your Weight Watchers repertoire.
  • Easy Cleanup: Minimal oil usage results in less mess and easier cleanup after cooking.

These advantages make air frying an excellent method for creating healthy, delicious snacks that support your weight management goals.

Common Mistakes to Avoid

Overcrowding the Tray, Uneven Oil Distribution, and Wrong Temperatures

Avoiding common errors can significantly improve the quality of your oven-made flour tortilla snack. Here are some pitfalls to watch out for:

  • Overcrowding the Tray:
    • Issue: Placing too many chips on the baking sheet can restrict air circulation, leading to uneven cooking and soggy chips.
    • Solution: Spread the chips in a single layer with enough space between them to allow for proper air flow and crisping.
  • Uneven Oil Distribution:
    • Issue: Unevenly distributed oil can result in some chips being too greasy while others remain dry.
    • Solution: Lightly spray or brush the tortillas with oil, ensuring an even coating on all sides.
  • Wrong Temperature:
    • Issue: Baking at too high a temperature can burn the chips, while too low a temperature may result in undercooked, chewy chips.
    • Solution: Stick to the recommended temperature of 375°F (190°C) for optimal crispiness without burning.
  • Skipping Preheating:
    • Issue: Not preheating the oven can lead to longer cooking times and unevenly cooked chips.
    • Solution: Always preheat your oven to the desired temperature before baking the chips.
  • Inadequate Seasoning:
    • Issue: Insufficient seasoning can make the chips bland, while excessive seasoning can make them overpowering.
    • Solution: Measure your seasonings accurately and toss the chips thoroughly to ensure even flavor distribution.
  • Using Thick Tortillas:
    • Issue: Thick tortillas may not crisp up properly and can remain chewy even after baking.
    • Solution: Use thinner tortillas for a crispier texture, ensuring they bake evenly and become delightfully crunchy.

By avoiding these common mistakes, you can consistently produce delicious and Weight Watchers-friendly crispy tortilla chips oven that are both healthy and satisfying.

FAQs About Oven-Roasted Flour Tortilla Chips

How do I prevent my tortilla chips from burning in the oven?

To prevent burning, bake the chips at the recommended temperature of 375°F (190°C) and keep a close eye on them, especially towards the end of the cooking time. Flipping the chips halfway through also helps ensure even cooking.

Can I add other flavors to my baked tortilla chips?

Yes, feel free to experiment with different seasonings like garlic powder, onion powder, paprika, or even sweet flavors like vanilla extract for unique twists on your homemade flour tortilla chips oven.

How long do homemade baked tortilla chips last?

When stored in an airtight container at room temperature, these chips can stay fresh and crispy for up to a week. For longer storage, consider freezing them and reheating as needed.

Creative Serving Ideas for Flour Tortilla Chips

Party Platters, Nacho Recipes, and More

Elevate your oven-baked flour tortilla chips experience by pairing them with creative serving ideas:

  • Party Platters:
    • Cheese and Dips: Arrange your chips with a variety of low-point dips like salsa, guacamole, and Greek yogurt-based sauces.
    • Fruit and Nut Mix: Combine sweet fruits like strawberries or apples with nuts for a balanced platter.
  • Nacho Recipes:
    • Healthy Nachos: Top your chips with low-fat cheese, black beans, diced tomatoes, and green onions for a nutritious nacho platter.
    • Veggie-Loaded: Add bell peppers, onions, and corn to create a colorful and healthy nacho spread.
  • Appetizers:
    • Stuffed Chips: Fill chips with a mixture of lean protein, vegetables, and low-fat cheese for a satisfying appetizer.
    • Dessert Chips: Pair sweet chips with chocolate hummus or fruit compote for a delightful dessert option.
  • Snack Packs:
    • On-the-Go Snacks: Create individual snack packs with a portion of chips and a small container of dip for convenient and healthy snacking.
  • Themed Parties:
    • Mexican Fiesta: Serve your chips with traditional Mexican dips and toppings for an authentic fiesta experience.
    • Movie Night: Pair your chips with healthy popcorn and a variety of dips for a perfect movie night snack.

These creative serving ideas make your easy baked tortilla chips even more enjoyable, turning a simple snack into a gourmet experience.

Conclusion

Flour tortilla chips oven offer a delicious, healthy, and versatile snack option that aligns perfectly with Weight Watchers’ principles. By using the right ingredients, following best baking practices, and exploring creative flavor variations, you can create homemade chips that are both satisfying and nutritious. Whether you’re aiming to manage your weight, reduce fat intake, or simply enjoy a tasty snack, oven-baked flour tortilla chips are a fantastic choice.

Air Fryer Tortilla Chips Weight Watchers: A Healthy and Delicious Snack

Crispy air fryer tortilla chips served with salsa, guacamole, and yogurt-based dips, styled with fresh garnishes

Snacking doesn’t have to derail your weight management goals. Air fryer tortilla chips Weight Watchers is a perfect example of a healthy, low-point snack that satisfies your cravings without compromising your diet. Whether you’re following the Weight Watchers program or simply seeking a nutritious alternative to traditional chips, this recipe is sure to become a staple in your kitchen.

In this comprehensive guide, we’ll explore everything you need to know to create delicious and Weight Watchers-friendly air fryer tortilla chips.

What Are Weight Watchers Points?

Overview of Weight Watchers and Its Points System

Weight Watchers, now known as WW, is a popular weight management program that emphasizes a balanced approach to eating and healthy living. At the core of WW is the Points system, which assigns a point value to foods based on their nutritional content, including calories, fat, and fiber. This system encourages mindful eating by helping individuals make healthier food choices while still enjoying their favorite snacks in moderation. Understanding the Points system is essential for creating Weight Watchers-friendly recipes like air fryer tortilla chips Weight Watchers, ensuring that your snacks align with your weight loss goals.

Benefits of Air Fryer Tortilla Chips for Weight Watchers

Healthier Snacking Options for Weight Management

Choosing the right snacks is crucial when following a weight management plan. Healthy air fryer tortilla chips recipe offers several benefits that make them an excellent choice for those tracking their Points:

  • Lower Calorie Content: Air frying requires little to no oil, significantly reducing the calorie count compared to traditional frying methods.
  • Reduced Fat Intake: By minimizing the use of oil, these chips are lower in unhealthy fats, supporting heart health and weight loss.
  • Portion Control: Homemade chips allow you to control the size and quantity, making it easier to stay within your daily Points budget.
  • Nutrient-Rich: Using whole-grain or low-calorie tortillas adds fiber and essential nutrients to your snack, promoting satiety and digestive health.
  • Versatility: These chips can be paired with a variety of low-point dips, enhancing flavor without adding excessive Points.

These benefits make air fryer tortilla chips Weight Watchers a smart and satisfying snack option that aligns with your health and weight management goals.

Ingredients for Weight Watchers Air Fryer Tortilla Chips

Tortillas, Oil Alternatives, and Seasonings

Creating low-point tortilla chips air fryer is simple and requires just a few wholesome ingredients:

  • Tortillas: Choose low-calorie, whole-grain, or corn tortillas for a healthier base.
  • Oil Alternatives: Use a light spray of olive oil or a cooking spray to keep the chips crispy without adding many Points.
  • Seasonings: Opt for spices like cinnamon, paprika, or chili powder to add flavor without extra calories.
  • Optional Add-ins: Incorporate herbs like oregano or garlic powder for an extra kick.

These ingredients are easy to find and allow you to customize the flavor of your chips while keeping them Weight Watchers-friendly.

Fresh ingredients for homemade tortilla chips, including tortillas, olive oil spray, and spices, on a wooden board

Choosing the Right Tortillas for Weight Watchers

Low-Calorie, Whole-Grain, and Gluten-Free Options

Selecting the right type of tortilla is crucial for creating a Weight Watchers-friendly chips air fryer recipe. Here are the best options:

  • Low-Calorie Tortillas: Look for tortillas that are specifically labeled as low-calorie or reduced-fat. These typically have fewer Points per serving, making them ideal for Weight Watchers.
  • Whole-Grain Tortillas: Whole grains provide more fiber and nutrients compared to refined grains, helping you feel fuller longer and supporting digestive health.
  • Gluten-Free Tortillas: For those with gluten sensitivities, gluten-free tortillas made from ingredients like almond flour or chickpea flour are excellent choices.
  • Corn Tortillas: Corn tortillas are naturally lower in calories and fat, making them a great option for creating crispy, low-point chips.

By choosing the right tortillas, you ensure that your homemade air fryer tortilla chips for Weight Watchers are both delicious and aligned with your dietary goals.

Step-by-Step Guide to Making Air Fryer Tortilla Chips

Detailed Instructions for Weight Watchers-Friendly Chips

Follow these simple steps to create your own air fryer crispy cinnamon sugar chips:

Prepare the Tortillas

  1. Choose Your Tortilla: Select your preferred type of tortilla—low-calorie, whole-grain, or corn.
  2. Cut into Shapes: Use a pizza cutter or sharp knife to cut the tortillas into triangles or your desired chip shape.

Season the Chips

  1. Lightly Spray with Oil: Lightly spray both sides of the tortilla pieces with olive oil or cooking spray. This helps the seasoning adhere and promotes crispiness.
  2. Add Seasonings: Sprinkle your chosen seasonings evenly over the tortilla pieces. For a sweet twist, use a mixture of cinnamon and a small amount of sugar.

Air Fry the Chips

  1. Preheat the Air Fryer: Set your air fryer to 350°F (175°C) and let it preheat for about 3 minutes.
  2. Arrange the Chips: Place the seasoned tortilla pieces in a single layer in the air fryer basket. Avoid overcrowding to ensure even cooking.
  3. Cook: Air fry the chips for 5-7 minutes, shaking the basket halfway through the cooking time to promote even crisping.
  4. Check for Doneness: The chips should be golden brown and crispy. If they need more time, cook for an additional 1-2 minutes, keeping a close eye to prevent burning.

Serve and Enjoy

  1. Cool Slightly: Allow the chips to cool for a few minutes to firm up.
  2. Serve: Enjoy your air fryer tortilla chips Weight Watchers with your favorite low-point dips or as a standalone snack.

Tips:

  • Uniform Cutting: Ensure all tortilla pieces are cut to a similar size for even cooking.
  • Even Seasoning: Distribute the seasoning evenly to avoid clumping and ensure every chip is flavorful.
Collage showing the process of making tortilla chips in an air fryer, from cutting to seasoning to serving

Portion Sizes and Points Calculation

How to Calculate Points for Homemade Tortilla Chips

Understanding how to calculate Points is essential for integrating low-point tortilla chips air fryer into your Weight Watchers plan:

  • Tortilla Points: Check the Points value on the tortilla packaging. Divide by the number of chips per serving to determine Points per chip.
  • Oil Points: A light spray of olive oil or cooking spray typically adds minimal Points. Refer to the oil’s Points value and adjust based on usage.
  • Seasoning Points: Most spices have zero Points, but be mindful of any added sugars, which may contribute to the overall Points.
  • Total Points: Add up the Points from tortillas, oil, and any added ingredients to get the total Points per serving.

By accurately calculating the Points, you can enjoy your air fryer chips Weight Watchers without exceeding your daily Points budget.

Flavor Variations for Tortilla Chips

Sweet and Savory Options Like Cinnamon, Paprika, and Chili

Customizing the flavor of your air fryer snack Weight Watchers adds variety and keeps your snacking experience exciting. Here are some delicious options:

  • Sweet Cinnamon Sugar:
    • Mix cinnamon and a small amount of sugar for a classic sweet flavor.
    • Add a touch of vanilla extract for extra aroma.
  • Savory Paprika:
    • Use smoked paprika for a rich, smoky flavor.
    • Combine with garlic powder and a pinch of salt for a robust taste.
  • Chili Lime:
    • Sprinkle chili powder and a squeeze of lime juice for a zesty kick.
    • Add a dash of cumin for an earthy undertone.
  • Herbed Parmesan:
    • Mix dried oregano, thyme, and a sprinkle of grated Parmesan for a cheesy, herb-infused flavor.
  • Spicy Cajun:
    • Combine Cajun seasoning with a touch of cayenne pepper for heat.

These flavor variations allow you to tailor your air fryer low-calorie snack tortilla chips to your personal preferences and make snacking more enjoyable.

Best Cooking Tips for Perfect Air Fryer Tortilla Chips

Tips to Avoid Soggy or Overly Crispy Chips

Achieving the perfect texture for your Weight Watchers crispy tortilla chips requires attention to detail. Follow these tips to ensure your chips come out just right:

  • Preheat the Air Fryer: Always preheat your air fryer to the recommended temperature before cooking to ensure even heat distribution.
  • Single Layer: Arrange the chips in a single layer without overlapping to promote crispiness and prevent sogginess.
  • Monitor Cooking Time: Keep a close eye on the chips as they cook. Air fryers can vary in performance, so adjust the cooking time as needed.
  • Shake the Basket: Shake the air fryer basket halfway through cooking to ensure all chips are evenly exposed to the hot air.
  • Cool on a Rack: After cooking, place the chips on a cooling rack to allow air to circulate around them, preventing them from becoming soggy.
  • Avoid Excess Oil: Use only a light spray of oil to keep the chips healthy and low in Points. Too much oil can lead to greasiness and added calories.
  • Season Immediately: Season the chips right after cooking while they are still warm. This helps the seasoning adhere better.

By following these tips, you can create consistently delicious air fryer cinnamon sugar chips that are perfectly crispy and satisfying.

Dips and Sides for Weight Watchers Tortilla Chips

Low-Point Salsa, Guacamole, and Yogurt-Based Dips

Pairing your air fryer chips recipe Weight Watchers with the right dips enhances the flavor and makes for a more satisfying snack. Here are some low-point options:

  • Salsa:
    • Fresh tomato salsa adds a tangy and spicy kick without adding many Points.
    • Consider making homemade salsa with tomatoes, onions, cilantro, and lime juice for maximum flavor and control over ingredients.
  • Guacamole:
    • Use a light hand with avocado and limit added ingredients like oil or cheese to keep Points low.
    • Combine avocado with diced tomatoes, onions, and a squeeze of lime for a simple and delicious dip.
  • Yogurt-Based Dips:
    • Greek yogurt can be mixed with herbs and spices to create a creamy, low-point dip.
    • Try a dill yogurt dip or a spicy yogurt sauce for variety.
  • Bean Dips:
    • Refried beans or black bean dips provide a protein-rich option that pairs well with tortilla chips.
    • Ensure the dips are low in fat and sodium to keep them Weight Watchers-friendly.
  • Hummus:
    • Choose low-fat hummus varieties or make your own to control the ingredients.
    • Flavored hummus, such as roasted red pepper or garlic, can add extra taste without adding many Points.

These dips not only complement the flavor of your air fryer tortilla chips Weight Watchers but also add nutritional value, making your snack both tasty and healthy.

Storing and Reheating Air Fryer Tortilla Chips

Keeping Chips Fresh and Crispy

Proper storage and reheating are essential to maintain the freshness and crunch of your air fryer low-calorie snack tortilla chips:

  • Storing:
    • Airtight Container: Store the chips in an airtight container to prevent moisture from making them soggy.
    • Cool, Dry Place: Keep the container in a cool, dry place away from direct sunlight to maintain the chips’ crispiness.
    • Avoid Refrigeration: Refrigerating can introduce moisture, making the chips less crispy. Store them at room temperature instead.
  • Reheating:
    • Air Fryer: Reheat the chips in the air fryer at 350°F (175°C) for 2-3 minutes to restore their crispiness.
    • Oven: Place the chips on a baking sheet and heat in a preheated oven at 350°F (175°C) for about 5 minutes.
    • Microwave: While not ideal for maintaining crispiness, you can microwave the chips for 15-20 seconds and then air fry or bake to regain crunch.

By following these storage and reheating tips, you can enjoy your air fryer tortilla chips Weight Watchers at their best, even days after making them.

Benefits of Air Fryer Cooking for Weight Watchers

Lower Oil Consumption, Calorie Control, and Quick Cooking

Using an air fryer to prepare air fryer low-calorie snack recipe offers several benefits that align perfectly with Weight Watchers’ principles:

  • Lower Oil Consumption: Air frying uses significantly less oil than traditional frying methods, reducing the overall fat and calorie content of your snacks.
  • Calorie Control: With precise control over cooking times and temperatures, you can manage the calorie intake of your snacks more effectively.
  • Quick Cooking: Air fryers cook food faster than conventional ovens, making it easier to prepare healthy snacks on the go.
  • Versatility: Beyond chips, air fryers can be used to cook a wide range of low-point snacks and meals, enhancing your Weight Watchers repertoire.
  • Easy Cleanup: Minimal oil usage results in less mess and easier cleanup, making healthy cooking more convenient.

These advantages make air frying an excellent method for creating healthy, delicious snacks that support your weight management goals.

Common Mistakes to Avoid

Overcrowding the Basket, Uneven Seasoning, and Wrong Temperature

Avoiding common errors can significantly improve the quality of your Weight Watchers chips air fryer recipe. Here are some pitfalls to watch out for:

  • Overcrowding the Basket:
    • Issue: Placing too many chips in the air fryer basket can restrict air circulation, leading to uneven cooking and soggy chips.
    • Solution: Cook the chips in small batches, ensuring each chip has enough space to crisp up properly.
  • Uneven Seasoning:
    • Issue: Unevenly distributed seasoning can result in some chips being too sweet or overly spiced while others lack flavor.
    • Solution: Lightly spray the chips with oil and sprinkle the cinnamon sugar mixture evenly. Toss the chips halfway through cooking to ensure consistent seasoning.
  • Wrong Temperature:
    • Issue: Cooking at too high a temperature can burn the chips, while too low a temperature may result in soggy, undercooked chips.
    • Solution: Stick to the recommended temperature of 350°F (175°C) for optimal crispiness without burning.
  • Using Too Much Oil:
    • Issue: Excessive oil can lead to greasy chips and added Points.
    • Solution: Use a light spray of oil to keep the chips crispy without overloading them with fat.
  • Skipping Preheating:
    • Issue: Not preheating the air fryer can lead to longer cooking times and unevenly cooked chips.
    • Solution: Always preheat your air fryer for a few minutes before adding the chips to ensure even cooking from the start.

By avoiding these common mistakes, you can consistently produce delicious and Weight Watchers-friendly air fryer tortilla chips Weight Watchers that are both healthy and satisfying.

FAQs About Healthy Air Fryer Tortilla Chips Recipe

Are air fryer tortilla chips Weight Watchers lower in calories than store-bought chips?

Yes, homemade air fryer chips Weight Watchers recipe allows you to control the ingredients and oil usage, resulting in lower-calorie chips compared to many store-bought options that often contain added fats and preservatives.

Can I make these chips gluten-free for Weight Watchers?

Absolutely! Use gluten-free tortillas made from corn or other gluten-free grains to create Weight Watchers-friendly chips in air fryer, ensuring they align with your dietary needs.

How long do air fryer tortilla chips Weight Watchers stay fresh?

When stored in an airtight container at room temperature, these chips can stay fresh and crispy for up to a week. For longer storage, consider freezing them and reheating as needed.

Can I add other spices to the cinnamon sugar mixture for more flavor?

Yes, feel free to experiment with additional spices like nutmeg, cardamom, or even a pinch of salt to enhance the flavor profile of your air fryer snack Weight Watchers.

What is the best type of oil to use for Weight Watchers air fryer chips?

Olive oil or a light cooking spray are excellent choices. They provide the necessary coating for crispiness without adding excessive Points.

Comparing Homemade vs. Store-Bought Tortilla Chips

Cost, Nutritional Value, and Taste Differences

When deciding between homemade air fryer tortilla chips Weight Watchers and store-bought options, consider the following factors:

  • Cost:
    • Homemade: Generally more affordable, especially when making large batches. Ingredients like tortillas and spices are cost-effective.
    • Store-Bought: Can be more expensive, particularly for specialty low-calorie or organic chips.
  • Nutritional Value:
    • Homemade: Allows you to control the ingredients, reducing unhealthy fats and preservatives while increasing fiber with whole-grain tortillas.
    • Store-Bought: Often contain added oils, sugars, and preservatives that can increase Points and reduce nutritional benefits.
  • Taste:
    • Homemade: Freshly made chips can be tailored to your taste preferences, whether you prefer them sweeter or spicier.
    • Store-Bought: Limited flavor options and consistency may not match the personalized taste of homemade chips.
  • Customization:
    • Homemade: Easily customizable with different seasonings and flavors to suit your cravings and dietary needs.
    • Store-Bought: Limited to the available flavors and may not cater to specific dietary restrictions.

Choosing to make your own air fryer chips recipe for Weight Watchers offers better control over health benefits, cost savings, and personalized flavor, making it a superior option for those following the Weight Watchers program.

Conclusion

Air fryer tortilla chips Weight Watchers provide a delicious and healthy alternative to traditional fried snacks. By leveraging the benefits of air frying—such as lower oil consumption, reduced calorie intake, and quicker cooking times—you can enjoy satisfying chips that align with your weight management goals. Whether you prefer sweet cinnamon sugar chips or savory paprika-flavored bites, this recipe offers versatility and ease of preparation.

By selecting the right ingredients, following best cooking practices, and being mindful of portion sizes and Points, you can incorporate air fryer tortilla chips Weight Watchers into your diet without guilt. Pairing these chips with low-point dips and incorporating healthy storage and reheating techniques ensures that your snacks remain fresh and enjoyable.

Embrace the simplicity and health benefits of making your own air fryer low-calorie snack tortilla chips and enjoy a tasty, Weight Watchers-friendly treat that everyone will love.

Happy snacking!

Air Fryer Tortilla Chips Cinnamon Sugar: A Sweet and Crunchy Delight

Air fryer tortilla chips coated with cinnamon sugar, served with chocolate dip and festive garnishes.

Air fryer tortilla chips with cinnamon sugar are quickly becoming a favorite treat for both kids and adults alike. This sweet twist on traditional tortilla chips combines the crispy texture of air-fried chips with the warm, comforting flavors of cinnamon and sugar. Whether you’re hosting a party, enjoying a movie night, or simply craving a delicious snack, air fryer tortilla chips cinnamon sugar are the perfect choice.

In this comprehensive guide, we’ll explore everything you need to know to create these delightful chips, from selecting the best tortillas to perfecting your cinnamon sugar mixture. If you’d like to try a savory twist, check out these flour tortilla chips in an air fryer.

What Makes Air Fryer Tortilla Chips Special?

Benefits of Using an Air Fryer for Chips Over Traditional Frying

Using an air fryer to make sweet tortilla chips air fryer recipe offers several advantages over traditional deep-frying methods:

  • Healthier Cooking: Air frying requires significantly less oil, reducing the fat and calorie content of your chips.
  • Convenience: Air fryers heat up quickly and cook chips faster than conventional ovens, saving you time in the kitchen.
  • Ease of Use: With simple temperature and timer settings, air frying is straightforward and user-friendly.
  • Less Mess: Air frying eliminates the need for large amounts of oil, minimizing cleanup and reducing kitchen mess.
  • Consistent Results: The rapid air circulation ensures even cooking, resulting in perfectly crispy chips every time.

These benefits make air fryer tortilla chips a healthier, quicker, and cleaner alternative to traditional fried snacks.

The Appeal of Cinnamon Sugar Flavor

How This Sweet Twist Elevates Traditional Tortilla Chips

Cinnamon sugar adds a delightful sweetness and a hint of spice to traditional tortilla chips, transforming them into a versatile treat that can be enjoyed in various ways:

  • Flavor Enhancement: The combination of cinnamon and sugar complements the mild flavor of tortilla chips, creating a balanced and enjoyable taste.
  • Versatility: Sweet tortilla chips can be paired with a variety of dips, such as chocolate sauce, caramel, or fruit preserves, making them suitable for both desserts and snacks.
  • Aesthetic Appeal: The golden-brown chips coated with cinnamon sugar look appealing and appetizing, making them perfect for serving at gatherings and parties.
  • Comfort Factor: The warm flavors of cinnamon and sugar evoke a sense of comfort and nostalgia, making the chips a favorite for many.

This sweet twist not only enhances the flavor but also broadens the range of occasions and pairings for tortilla chips.

Essential Ingredients for Air Fryer Tortilla Chips with Cinnamon Sugar

Simple, Easy-to-Find Ingredients

Creating air fryer tortilla chips cinnamon sugar requires just a few simple ingredients that are easy to find in any grocery store:

  • Tortillas: Flour, corn, or whole wheat tortillas can be used based on your preference.
  • Butter or Oil: To help the cinnamon sugar adhere to the chips. Olive oil or melted butter are great choices.
  • Cinnamon: Provides the warm, spicy flavor that pairs perfectly with sugar.
  • Granulated Sugar: Adds the necessary sweetness to the chips.
  • Optional Add-ins: Vanilla extract or a pinch of salt can enhance the flavor profile.

These ingredients come together to create a simple yet delicious snack that’s both easy to prepare and incredibly satisfying.

Best Tortillas for Air Fryer Chips

Types of Tortillas: Flour, Corn, Whole Wheat

Choosing the right type of tortilla is crucial for achieving the perfect sweet tortilla chips air fryer recipe:

  • Flour Tortillas: These are soft and pliable, making them easy to cut into chips. They tend to be slightly sweeter, which complements the cinnamon sugar coating well.
  • Corn Tortillas: These are sturdier and provide a more robust crunch. They have a distinct corn flavor that pairs nicely with the sweet and spicy seasoning.
  • Whole Wheat Tortillas: These offer a healthier alternative with added fiber and a slightly nuttier flavor. They can add an extra layer of taste to your sweet chips.

Each type of tortilla brings its unique texture and flavor, allowing you to customize your chips based on your personal preferences and dietary needs.

Ingredients for making air fryer cinnamon sugar tortilla chips, including tortillas, sugar, cinnamon, and melted butter

Step-by-Step Guide to Making Air Fryer Tortilla Chips with Cinnamon Sugar

Detailed Cooking Instructions

Follow these simple steps to create delicious air fryer tortilla chips cinnamon sugar:

Prepare the Tortillas

  1. Choose Your Tortilla: Select your preferred type of tortilla—flour, corn, or whole wheat.
  2. Cut into Shapes: Use a pizza cutter or sharp knife to cut the tortillas into triangles or any desired shape for chips.

Season the Chips

  1. Melt the Butter or Oil: In a small bowl, melt 2 tablespoons of butter or mix 2 tablespoons of olive oil.
  2. Combine Cinnamon and Sugar: In another bowl, mix 1 tablespoon of granulated sugar with 1 teaspoon of ground cinnamon.
  3. Coat the Chips: Lightly brush each tortilla triangle with the melted butter or oil, then sprinkle the cinnamon sugar mixture evenly over both sides of the chips.

Air Fry the Chips

  1. Preheat the Air Fryer: Set your air fryer to 350°F (175°C) and let it preheat for about 3 minutes.
  2. Arrange the Chips: Place the coated tortilla chips in a single layer in the air fryer basket. Avoid overcrowding to ensure even cooking.
  3. Cook: Air fry the chips for 5-7 minutes, shaking the basket halfway through the cooking time to ensure they crisp up evenly.
  4. Check for Doneness: The chips should be golden brown and crispy. If they need more time, air fry for an additional 1-2 minutes, keeping a close eye to prevent burning.

Serve and Enjoy

  1. Cool Slightly: Allow the chips to cool for a few minutes to firm up.
  2. Serve: Enjoy your air fryer tortilla chips cinnamon sugar warm as a sweet snack or pair them with your favorite dips and desserts.

Tips:

  • Uniform Cutting: Ensure all tortilla pieces are cut to a similar size for even cooking.
  • Even Coating: Spread the butter or oil and cinnamon sugar evenly to avoid clumping and ensure every chip is flavorful.

Perfecting the Cinnamon Sugar Mixture

Ratio and Tips for Even Coating

Creating the perfect cinnamon sugar coating is key to delicious sweet air fryer tortilla chips. Here’s how to get it just right:

  • Balance the Flavors: Use a ratio of 1 teaspoon of cinnamon to 1 tablespoon of sugar for a balanced sweetness and spice.
  • Adjust to Taste: Feel free to adjust the cinnamon and sugar amounts based on your preference for sweetness or spice.
  • Mix Thoroughly: Ensure the cinnamon and sugar are well combined to distribute the flavors evenly across the chips.
  • Even Application: Brush the melted butter or oil evenly before sprinkling the cinnamon sugar to help the mixture adhere properly.

By perfecting your cinnamon sugar mixture, you can achieve a consistent and delicious flavor in every bite.

Collage showing steps to make cinnamon sugar tortilla chips in an air fryer, from cutting tortillas to air frying and serving

Best Temperature and Timing for Air Fryer Chips

How to Achieve the Perfect Crunch

Achieving the ideal crunch for your air fryer cinnamon sugar chips requires precise temperature and timing:

  • Temperature: Set your air fryer to 350°F (175°C). This temperature is high enough to crisp up the chips without burning the cinnamon sugar.
  • Timing: Cook the chips for 5-7 minutes. Start checking at the 5-minute mark to prevent overcooking. Depending on your air fryer model and the thickness of the chips, you may need to adjust the cooking time slightly.
  • Shaking the Basket: Shake the air fryer basket halfway through the cooking process to ensure even crisping on all sides.
  • Monitoring: Keep a close eye on the chips towards the end of the cooking time to achieve the perfect golden-brown color without burning.

Following these guidelines will help you create perfectly crispy and flavorful air fryer tortilla chips cinnamon sugar every time.

Creative Ways to Serve Cinnamon Sugar Tortilla Chips

Dessert Dips, Ice Cream Toppings, and More

Elevate your air fryer snack cinnamon sugar by pairing it with creative accompaniments:

  • Dessert Dips:
    • Chocolate Fondue: Dip the chips in melted chocolate for a decadent treat.
    • Caramel Sauce: Drizzle caramel over the chips for a rich and sweet experience.
    • Cream Cheese Frosting: Offer a tangy contrast to the sweet chips with a creamy dip.
  • Ice Cream Toppings:
    • Vanilla Ice Cream: Crush the chips and sprinkle them over vanilla ice cream for added crunch.
    • Salted Caramel Ice Cream: Pair the sweet chips with a salty caramel flavor for a delightful balance.
  • Fruit Compote:
    • Berry Compote: Serve the chips alongside a warm berry compote for a fruity twist.
    • Apple Cinnamon: Create a comforting combination with apple slices and cinnamon.
  • Savory Pairings:
    • Cheese Platter: Offer the chips as part of a cheese and fruit platter for a versatile appetizer.
    • Yogurt Dip: Provide a creamy yogurt dip with a hint of honey to complement the sweet chips.

These creative serving ideas make your homemade cinnamon chips in air fryer even more enjoyable, turning a simple snack into a gourmet experience.

Healthy Tweaks for Air Fryer Cinnamon Sugar Chips

Lower-Sugar Options and Whole-Grain Tortillas

If you’re looking to make your air fryer cinnamon sugar chips healthier, consider these simple tweaks:

  • Lower-Sugar Options:
    • Reduce Sugar Amount: Cut back on the granulated sugar by half and increase the cinnamon for more spice without the extra sweetness.
    • Use Coconut Sugar: Substitute regular sugar with coconut sugar for a lower glycemic index and added nutrients.
  • Whole-Grain Tortillas:
    • Choose Whole Wheat: Use whole wheat tortillas instead of refined flour tortillas to add more fiber and nutrients to your chips.
    • Sprouted Grain Tortillas: Opt for sprouted grain tortillas for enhanced digestibility and a richer flavor.
  • Alternative Sweeteners:
    • Honey or Maple Syrup: Replace granulated sugar with a drizzle of honey or maple syrup for a natural sweetness.
    • Stevia: Use a stevia-based sweetener for a low-calorie option.
  • Add Nutrient Boosters:
    • Chia Seeds: Sprinkle chia seeds over the chips for added fiber and omega-3 fatty acids.
    • Flaxseeds: Add ground flaxseeds to the cinnamon sugar mixture for a nutritious boost.

These healthy modifications allow you to enjoy your easy air fryer cinnamon sugar chips without compromising on taste or nutritional value.

Troubleshooting Common Issues

Avoiding Burning, Uneven Cooking, and Sticking

Creating the perfect air fryer crispy cinnamon sugar chips can sometimes come with challenges. Here’s how to troubleshoot common issues:

  • Burning:
    • Solution: Lower the cooking temperature by 25°F (about 15°C) and reduce the cooking time. Keep a close watch, especially towards the end of the cooking process.
  • Uneven Cooking:
    • Solution: Ensure the chips are cut to uniform sizes and placed in a single layer in the air fryer basket. Shake the basket halfway through to promote even cooking.
  • Sticking:
    • Solution: Brush the chips lightly with melted butter or oil to create a barrier between the chips and the air fryer basket. Alternatively, use parchment paper or a silicone mat designed for air fryers to prevent sticking.
  • Too Sweet or Spicy:
    • Solution: Adjust the ratio of cinnamon and sugar to your taste preferences. If the chips are too sweet, reduce the sugar amount or increase the cinnamon.
  • Lack of Crispiness:
    • Solution: Ensure the chips are thoroughly coated with the cinnamon sugar mixture and avoid overcrowding the basket. If necessary, cook the chips in smaller batches.

By addressing these common issues, you can consistently achieve delicious and perfectly cooked sweet air fryer tortilla snack every time.

Storing and Reheating Air Fryer Tortilla Chips

Keeping Them Fresh and Crispy

Proper storage and reheating are essential to maintain the freshness and crispiness of your air fryer sweet tortilla chips:

  • Storing:
    • Airtight Container: Store the chips in an airtight container to prevent moisture from making them soggy.
    • Cool, Dry Place: Keep the container in a cool, dry place away from direct sunlight to maintain the chips’ crispiness.
    • Avoid Refrigeration: Refrigerating can introduce moisture, making the chips less crispy.
  • Reheating:
    • Air Fryer: Reheat the chips in the air fryer at 350°F (175°C) for 2-3 minutes to restore their crispiness.
    • Oven: Place the chips on a baking sheet and heat in a preheated oven at 350°F (175°C) for about 5 minutes.
    • Microwave: While not ideal for crispiness, you can microwave the chips for 15-20 seconds and then air fry or bake to regain crunch.

By following these storage and reheating tips, you can enjoy your air fryer tortilla chips cinnamon sugar at their best, even days after making them.

FAQs About Air Fryer Tortilla Chips Cinnamon Sugar

Can I use store-bought cinnamon sugar for this recipe?

Yes, you can use store-bought cinnamon sugar. However, mixing your own allows you to control the ratio of cinnamon to sugar for a customized flavor.

What type of oil works best for air fryer cinnamon sugar chips?

Olive oil, melted butter, or coconut oil are great choices. They help the cinnamon sugar adhere to the chips and promote even cooking.

Can I make these chips gluten-free?

Absolutely! Use gluten-free tortillas made from alternative flours such as almond, coconut, or corn to create gluten-free air fryer cinnamon sugar chips.

How thick should the tortilla chips be?

Aim for a thickness of about 1/8 to 1/4 inch. Thinner chips will be crispier, while thicker chips will have a bit more chew.

Can I add other spices to the cinnamon sugar mixture?

Yes, you can add spices like nutmeg, cardamom, or even a pinch of salt to enhance the flavor profile of your chips.

Pairing Ideas for Cinnamon Sugar Tortilla Chips

Best Dips and Drinks to Serve Alongside

Enhance your sweet air fryer tortilla chips experience by pairing them with complementary dips and beverages:

  • Chocolate Fondue: Melt dark or milk chocolate and use the chips as a sweet dip.
  • Caramel Sauce: Drizzle warm caramel over the chips for an extra layer of sweetness.
  • Vanilla Ice Cream: Use the chips as a crunchy topping for a delicious dessert combination.
  • Fruit Compote: Serve the chips with a side of berry or apple compote for a fruity twist.
  • Coffee or Hot Chocolate: Pair the sweet chips with a warm beverage to balance the flavors.
  • Sweet Wine: A glass of dessert wine, such as Moscato or Riesling, complements the sweetness of the chips.

These pairing ideas elevate your air fryer dessert tortilla chips, making them perfect for any occasion.

Benefits of Using an Air Fryer for Sweet Snacks

Healthier Snacking and Convenience

Using an air fryer to prepare sweet snacks like air fryer cinnamon chip recipe offers numerous benefits:

  • Healthier Ingredients: Reduce the amount of oil used, cutting down on unhealthy fats while still achieving a crispy texture.
  • Quick Preparation: Air fryers cook snacks faster than conventional ovens, making it easy to prepare treats on short notice.
  • Versatility: Beyond chips, air fryers can be used to make a variety of sweet snacks, from baked goods to fried desserts.
  • Energy Efficiency: Air fryers use less energy compared to heating a full-sized oven, making them an eco-friendly choice.
  • Easy Cleanup: Minimal oil means less mess and easier cleanup after cooking.

These advantages make air frying an excellent method for creating healthier and more convenient sweet snacks.

Conclusion

Air fryer tortilla chips cinnamon sugar are a delightful and easy-to-make treat that combines the best of sweet and crunchy textures. By using an air fryer, you can achieve perfectly crispy chips with minimal oil, making this snack a healthier alternative to traditional fried chips. The combination of cinnamon and sugar elevates the humble tortilla chip into a gourmet snack that’s perfect for any occasion, from parties to cozy nights in.

By following our step-by-step guide, selecting the best tortillas, and perfecting your cinnamon sugar mixture, you can create a batch of delicious air fryer sweet tortilla snack in no time. Additionally, with creative serving ideas and healthy tweaks, these chips can be tailored to suit your taste preferences and dietary needs.

Happy snacking!

Why Does Brie Smell Like Ammonia? Understanding the Aroma of This Beloved Cheese

A wheel of creamy Brie cheese on a rustic board, surrounded by figs, walnuts, and honey.

Brie cheese is celebrated worldwide for its creamy texture, rich flavor, and elegant appearance. However, one characteristic that often puzzles cheese enthusiasts is its distinct ammonia-like smell. If you’ve ever encountered ammonia smell in Brie, you might wonder, why does Brie smell like ammonia?

This comprehensive guide delves into the reasons behind this aroma, exploring the science, safety, and ways to manage and enjoy Brie without being overwhelmed by its scent. If you want more Brie ideas, check out these air fryer Brie recipes.

What Is Brie Cheese?

History, Flavor Profile, and Texture

Brie cheese, often referred to as the “Queen of Cheeses,” originates from the Île-de-France region of France. This soft cheese is made from cow’s milk and is known for its pale interior with a slightly off-white, edible rind.

The flavor of Brie is mild yet complex, offering buttery and earthy notes that deepen with aging. Its smooth, creamy texture makes it a favorite for both casual snacking and gourmet dishes. Understanding the composition and production process of Brie helps explain why it sometimes develops a unique aroma, including the ammonia scent.

Why Does Brie Develop a Smell?

The Science Behind the Aromas in Brie Cheese

Cheese aroma is influenced by various biochemical processes that occur during fermentation and aging. In Brie, specific bacteria and enzymes break down proteins and fats, releasing volatile compounds responsible for its distinct smell.

The Brie cheese ammonia odor primarily results from the decomposition of amino acids into ammonia gas. This process is a natural part of cheese maturation, contributing to the complex flavor profile that Brie is known for.

What Causes the Ammonia Smell in Brie?

The Role of Bacteria and the Breakdown of Proteins

The ammonia aroma in Brie is primarily caused by the action of certain bacteria, such as Brevibacterium linens, which are intentionally introduced during the cheese-making process. These bacteria thrive in the rind, where they break down proteins into amino acids and further into ammonia.

This chemical reaction produces the characteristic ammonia smell that some people associate with Brie. Additionally, the extent of this smell can vary based on factors like the cheese’s age, storage conditions, and specific bacterial cultures used.

Is the Ammonia Smell in Brie Safe?

Understanding When Brie Is Safe to Eat

One common concern is whether the ammonia smell indicates spoilage or makes the cheese unsafe to consume. In most cases, Brie cheese odor explained by the presence of ammonia is a normal part of the cheese’s aging process and does not mean the cheese has gone bad.

However, excessive ammonia smell accompanied by other signs of spoilage, such as mold growth beyond the edible rind or an overly sour taste, may indicate that the Brie is no longer safe to eat. Always rely on your senses and when in doubt, err on the side of caution.

Ingredients for Brie cheese making, including milk, rennet, and bacterial cultures, on a marble counter

How to Tell If Brie Has Gone Bad

Signs to Differentiate Between Natural Aromas and Spoilage

Distinguishing between the natural ammonia smell and spoilage in Brie can be tricky. Here are some indicators to help you determine if your Brie is still good to eat:

  • Visual Inspection: Look for any unusual mold growth beyond the standard white rind. Colors like green or black mold are signs of spoilage.
  • Texture: Fresh Brie should be creamy and soft. If the cheese feels excessively dry or crumbly, it might be past its prime.
  • Taste: A spoiled Brie will have a sour or bitter taste, unlike the mild, creamy flavor of fresh Brie.
  • Smell: While a mild ammonia smell is normal, an overpowering or pungent odor might indicate that the cheese is no longer fresh.

By paying attention to these signs, you can enjoy Brie cheese safely and avoid consuming spoiled products.

Does All Brie Smell Like Ammonia?

Factors That Influence the Intensity of the Smell

Not all Brie cheeses emit a strong ammonia smell. The intensity of the aroma can vary based on several factors:

  • Age of the Cheese: Younger Brie tends to have a milder smell, while aged Brie may develop a more pronounced ammonia scent.
  • Storage Conditions: Proper storage in a cool, humid environment can help control the development of ammonia. Improper storage may accelerate the process, leading to a stronger odor.
  • Bacterial Cultures: Different cheese-makers use varying strains of bacteria, which can influence the extent of ammonia production.
  • Quality of Milk: High-quality milk with minimal contamination can result in a more pleasant aroma in the finished cheese.

Understanding these factors can help you select a Brie that suits your preference for aroma intensity.

How Aging Affects Brie’s Aroma

The Relationship Between Maturation and Ammonia Scent

Aging plays a crucial role in the development of Brie’s aroma. As the cheese matures, the activity of bacteria increases, breaking down more proteins and releasing additional ammonia. This process enhances the complexity of the cheese’s flavor but also intensifies the ammonia smell. Proper aging allows Brie to reach its optimal flavor profile, where the ammonia aroma is balanced with the cheese’s creamy and buttery notes.

How to Reduce the Ammonia Smell in Brie

Simple Methods to Make Brie More Palatable

If the ammonia smell in your Brie is too strong for your liking, there are several ways to mitigate it:

  • Air Out the Cheese: Allow the Brie to sit at room temperature for about 30 minutes before serving. This can help dissipate some of the ammonia odor.
  • Proper Storage: Store Brie in a cheese box or wrapped in wax paper, then placed in a partially open plastic bag to maintain humidity while allowing some airflow.
  • Pairing with Strong Flavors: Serving Brie with sweet accompaniments like honey, fruits, or nuts can help balance and mask the ammonia aroma.
  • Cutting and Exposing More Surface Area: Slice the Brie to expose more of its interior, which can help reduce the concentration of the ammonia smell.

These methods can make Brie more enjoyable, especially for those sensitive to strong odors.

Collage showing steps to reduce Brie’s ammonia smell: airing out, pairing with fruits, and proper storage.

Best Ways to Store Brie to Prevent Ammonia Smell

Proper Storage Tips to Maintain Freshness

Proper storage is essential to control the development of ammonia in Brie. Here are some tips to keep your Brie fresh and minimize unwanted smells:

  • Refrigeration: Store Brie in the refrigerator at a temperature between 35°F and 45°F (1.7°C to 7.2°C). Avoid storing it in the coldest part of the fridge to prevent freezing.
  • Wrapping: Use cheese paper, wax paper, or parchment paper to wrap Brie. These materials allow the cheese to breathe while maintaining moisture levels.
  • Avoid Airtight Containers: While it might seem counterintuitive, airtight containers can trap moisture and accelerate the production of ammonia. Instead, use a container that allows for some airflow.
  • Separate Storage: Keep Brie away from strong-smelling foods in the refrigerator to prevent odor absorption.

Following these storage practices can help maintain the quality and aroma of your Brie cheese.

Pairing Brie with Food to Balance the Aroma

Complementary Pairings Like Fruits, Crackers, and Wine

Pairing Brie with the right foods can enhance its flavor and balance the ammonia smell. Consider these complementary pairings:

  • Fruits: Fresh or dried fruits like apples, pears, figs, and grapes add natural sweetness that contrasts with the savory notes of Brie.
  • Nuts: Almonds, walnuts, and pecans provide a crunchy texture and earthy flavor that complements the creamy cheese.
  • Crackers and Bread: Whole grain crackers, baguette slices, and crostini offer a neutral base that allows the Brie’s flavors to shine.
  • Honey and Jams: Sweeteners like honey, fig jam, or apricot preserves can mask the ammonia aroma and enhance the cheese’s natural sweetness.
  • Wine: Pair Brie with white wines like Chardonnay or Sauvignon Blanc, or try a light red like Pinot Noir to elevate the overall tasting experience.

These pairings not only improve the taste but also make the Brie more enjoyable by balancing its aromatic profile.

Debunking Misconceptions About Brie’s Aroma

Several myths surround the ammonia smell in Brie cheese. Let’s debunk some common misconceptions:

  • Myth 1: Ammonia Smell Means the Cheese Is Spoiled: As discussed, a mild ammonia odor is a natural part of Brie’s aging process and doesn’t necessarily indicate spoilage.
  • Myth 2: All Brie Smells Like Ammonia: The intensity of the ammonia smell varies. Not all Brie cheeses emit a strong ammonia scent, especially younger varieties.
  • Myth 3: You Can’t Enjoy Brie If It Smells Like Ammonia: With proper pairing and preparation, the ammonia aroma can be managed, allowing you to enjoy the full flavor of Brie.
  • Myth 4: Only Poor-Quality Brie Has an Ammonia Smell: High-quality Brie can also develop an ammonia aroma as part of its natural maturation, so it’s not an indicator of poor quality.

Understanding the truth behind these myths can help you appreciate Brie cheese without unnecessary concerns about its aroma.

Choosing High-Quality Brie with Minimal Ammonia Smell

Tips for Selecting Fresh, Well-Made Brie

Selecting high-quality Brie can significantly impact your experience with its aroma. Here are some tips for choosing the best Brie:

  • Check the Expiration Date: Fresher Brie is less likely to have a strong ammonia smell. Choose cheeses that are within their recommended shelf life.
  • Inspect the Rind: Look for a smooth, white rind without excessive cracks or mold growth. A well-maintained rind indicates good quality.
  • Smell Before Buying: Give the cheese a gentle sniff. A subtle, pleasant aroma is ideal, whereas an overpowering ammonia smell might indicate an older or improperly stored cheese.
  • **Purchase from Reputable

Cheese Shops:** Buy Brie from trusted vendors who prioritize quality and proper storage. Specialty cheese shops often have knowledgeable staff who can recommend the best options.

  • Look for Organic or Artisanal Brie: These varieties are often made with higher-quality ingredients and better production standards, which can result in a more balanced aroma.

By following these tips, you can select Brie cheese that offers a delightful flavor and a manageable aroma, enhancing your overall cheese experience.

Health Benefits of Eating Brie

Nutritional Advantages of Including Brie in Your Diet

Brie cheese is not only delicious but also offers several health benefits when consumed in moderation:

  • Rich in Nutrients: Brie provides essential nutrients such as calcium, protein, and vitamins A and B12, which are crucial for bone health, muscle maintenance, and overall well-being.
  • Healthy Fats: The monounsaturated fats in Brie support heart health by helping to reduce bad cholesterol levels.
  • Probiotics: Brie contains beneficial bacteria that can aid in digestion and promote a healthy gut microbiome.
  • Antioxidants: Vitamins and minerals in Brie act as antioxidants, helping to protect the body from free radical damage.
  • Energy Boost: The combination of fats and proteins in Brie provides a sustained source of energy, making it a satisfying snack option.

Incorporating Brie into your diet can contribute to a balanced and nutritious eating plan, offering both flavor and health benefits.

FAQs About Brie Cheese Ammonia Odor

Why does Brie smell strong?

Brie develops a strong smell due to the activity of bacteria that break down proteins into amino acids and ammonia during the cheese’s maturation process.

Is Brie with an ammonia smell safe to eat?

Yes, a mild ammonia smell is a natural part of Brie’s aging. However, if the smell is overpowering and accompanied by other signs of spoilage, it may not be safe to consume.

How can I reduce the ammonia smell in Brie?

Letting the Brie sit at room temperature before serving, pairing it with sweet or acidic foods, and proper storage can help reduce the ammonia aroma.

Does all Brie cheese develop an ammonia smell?

No, not all Brie cheeses will have a strong ammonia smell. The intensity depends on factors like age, storage conditions, and bacterial cultures used during production.

Can I freeze Brie to prevent it from smelling like ammonia?

Freezing Brie can alter its texture and flavor. It’s better to store it properly in the refrigerator and consume it within its shelf life to minimize ammonia development.

Conclusion

Why does Brie smell like ammonia? The ammonia aroma in Brie cheese is a natural part of its maturation process, resulting from the breakdown of proteins by specific bacteria. While it can be off-putting for some, understanding the science behind the smell and knowing how to manage it can enhance your appreciation of this beloved cheese.

By selecting high-quality Brie, storing it correctly, and pairing it with complementary flavors, you can enjoy the rich, creamy texture and delightful taste of Brie without being overwhelmed by its aroma.

Embrace the complexity of Brie cheese and explore various ways to incorporate it into your meals. Whether you’re serving it as an elegant appetizer, pairing it with fruits and nuts, or enjoying it with a glass of wine, Brie offers a versatile and delicious addition to any dining experience.

With these insights, you can confidently navigate the nuances of Brie cheese and savor its unique qualities to the fullest.

Happy cheese tasting!