
Chocolate Covered Peanuts have become a worldwide phenomenon. Combining crispy, roasted peanuts with rich, velvety chocolate creates a flavor explosion that perfectly balances saltiness and sweetness. This peanut and chocolate combination is not only a delicious treat but also a versatile snack enjoyed at parties, as a dessert topping, or simply on the go.
Their popularity can be attributed to the innovative twist on traditional nut snacks, resulting in a gourmet peanut snack that appeals to both the young and the young at heart. Every bite delivers a satisfying crunch followed by a melt-in-your-mouth finish, making it one of the best sweet and salty snacks available today.
The History of Chocolate Covered Snacks
The journey of Chocolate Covered Peanuts is rooted in the broader trend of chocolate-coated nuts. Early confectioners experimented with dipping various nuts in chocolate, paving the way for what is now known as chocolate-coated nuts. Over time, this trend evolved into a favorite treat and an iconic gourmet snack with a rich heritage.
What started as a creative experiment in combining flavors has grown into a beloved tradition. Today, these snacks are celebrated for their unique twist on the classic nut treat, merging history with modern culinary innovation to create truly gourmet peanut snacks.
What Makes Chocolate Covered Peanuts Unique?
The magic behind Chocolate Covered Peanuts lies in their ability to deliver a perfect balance of crunchy texture and sweet flavor. The salty, roasted peanuts provide a robust, nutty base, while the high-quality chocolate adds a layer of indulgence. This harmonious blend results in a snack that is both satisfying and addictive.
- Flavor Fusion: The natural saltiness of the peanuts intensifies the sweetness of the chocolate, creating a dynamic taste.
- Textural Contrast: Each bite offers a delightful contrast between the crisp peanuts and the smooth, creamy chocolate.
- Versatility: Enjoy these treats on their own, as an ice cream topping, or as part of an elaborate dessert platter. Their appeal lies in their adaptability, making them a true nutty dessert for any occasion.
This unique combination of ingredients and textures ensures that Chocolate Covered Peanuts stand out among other sweet and salty snacks.
Choosing the Best Peanuts for Chocolate Coating
The foundation of perfect Chocolate Covered Peanuts begins with selecting the right type of peanut. Not all peanuts are created equal; the best results come from using premium, dry-roasted peanuts.
- Roasted Peanuts: For optimal flavor and crunch, choose dry-roasted peanuts. These have a rich, toasty taste that complements the sweetness of the chocolate.
- Salted vs. Unsalted: Depending on your preference, you can opt for lightly salted peanuts to enhance the flavor contrast or unsalted ones if you desire a purer chocolate and peanut combination.
- Uniform Size: Look for peanuts that are uniform in size and shape, as this ensures even coating and a consistent texture throughout your snack.
By choosing the best peanuts, you ensure that your final product is both delicious and visually appealing.
Selecting the Right Chocolate for Coating
The quality of the chocolate you use is crucial in making gourmet Chocolate Covered Peanuts. The chocolate must be smooth, glossy, and have a flavor profile that enhances the natural nuttiness of the peanuts.
- Dark Chocolate: With its robust, bittersweet flavor, dark chocolate provides a striking contrast with the salty peanuts.
- Milk Chocolate: For a creamier, sweeter taste, milk chocolate is an excellent choice.
- White Chocolate: Offering a rich, buttery flavor, white chocolate creates a unique and delicate pairing with roasted peanuts.
Using premium chocolate ensures a flawless coating, enhancing both the taste and texture of the final snack.
Recipe: How to Make Chocolate Covered Peanuts at Home
Creating your own Chocolate Covered Peanuts is both fun and rewarding. Follow this step-by-step guide to craft a batch of these gourmet treats in your own kitchen.
Ingredients for Peanut Clusters
- 2 cups high-quality, dry-roasted peanuts (lightly salted or unsalted based on preference)
- 8 oz premium chocolate (choose dark, milk, or white according to taste)
- A pinch of sea salt (optional, for extra flavor)
- Optional mix-ins: crushed nuts, caramel drizzle, or a hint of chili for a spicy kick
These easy ingredients form the basis for a delicious DIY chocolate peanut clusters recipe that’s sure to impress.
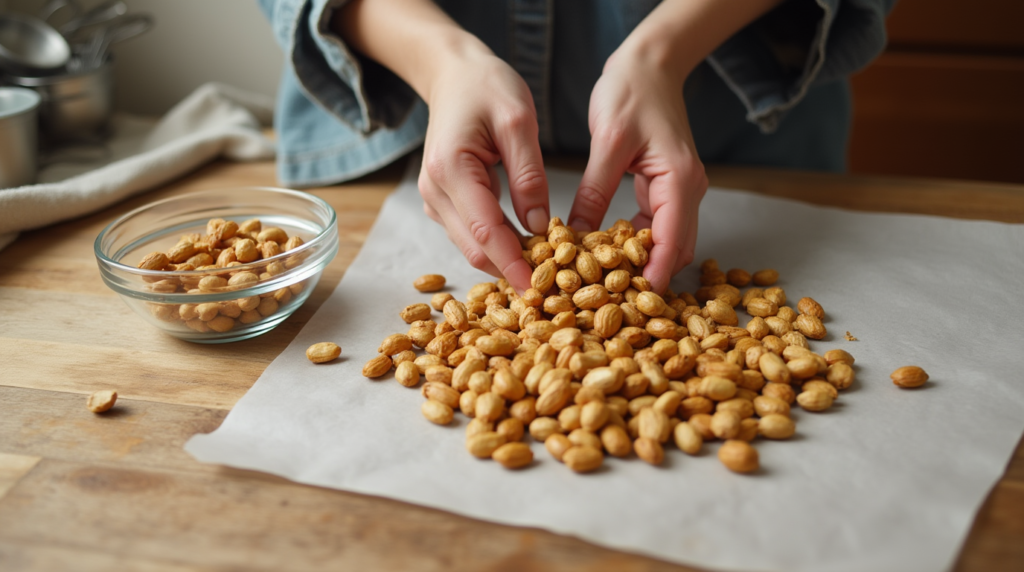
Step 1 – Preparing the Peanuts
Spread the roasted peanuts evenly on a parchment-lined tray. Ensure they are completely dry, as any moisture can hinder the chocolate’s adhesion. The right texture is crucial for achieving that perfect crunch in your snack.
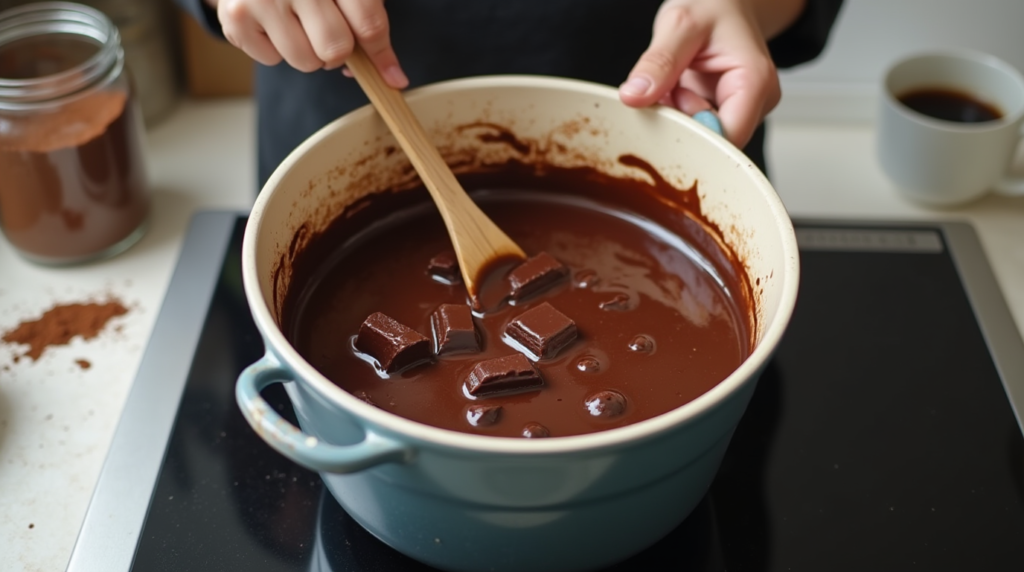
Step 2 – Melting the Chocolate Properly
Break the premium chocolate into small pieces and melt it using a microwave in 20-second intervals or with a double boiler. Stir frequently until the chocolate reaches a smooth, glossy consistency. Proper tempering of the chocolate is key to achieving an even, professional-looking coating.
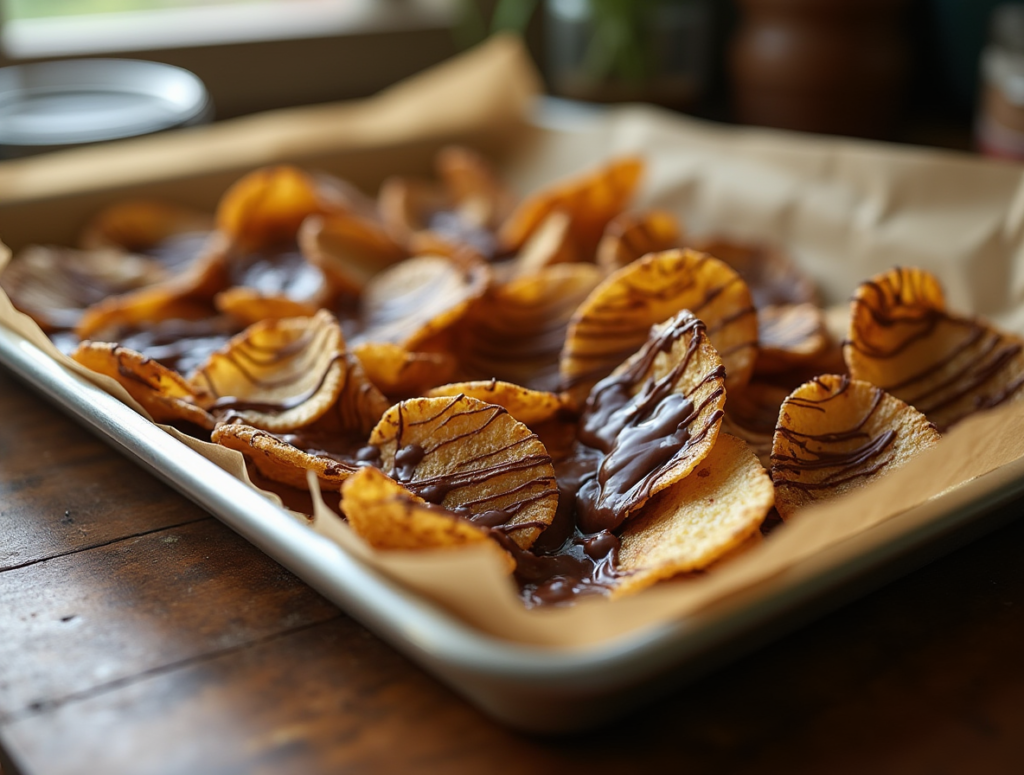
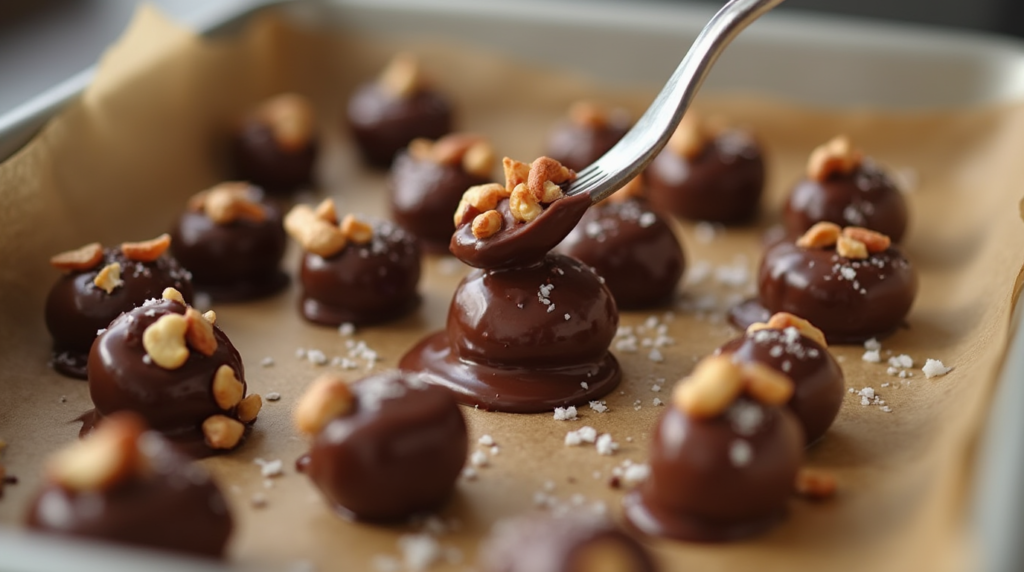
Step 3 – Coating the Peanuts Evenly
Using a fork or dipping tool, carefully dip each peanut into the melted chocolate. Allow the excess chocolate to drip off before placing the coated peanut back on the tray. For an added flavor dimension, sprinkle a tiny pinch of sea salt on the chocolate while it’s still wet. This technique ensures each peanut is uniformly coated, creating perfect nut clusters.
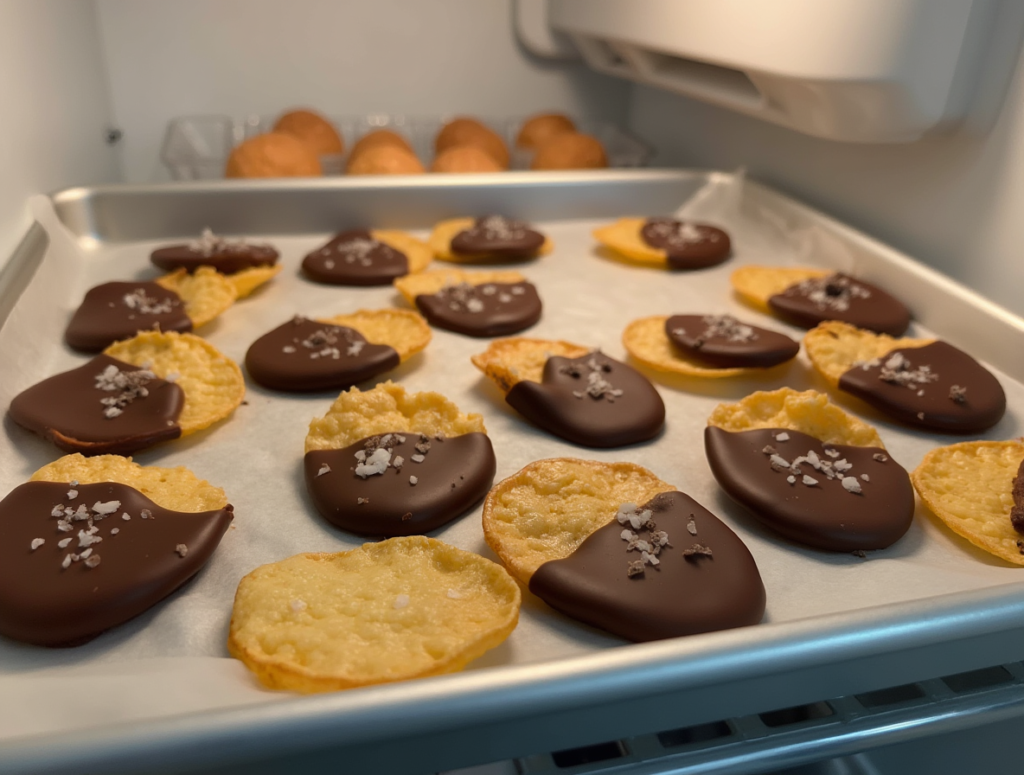
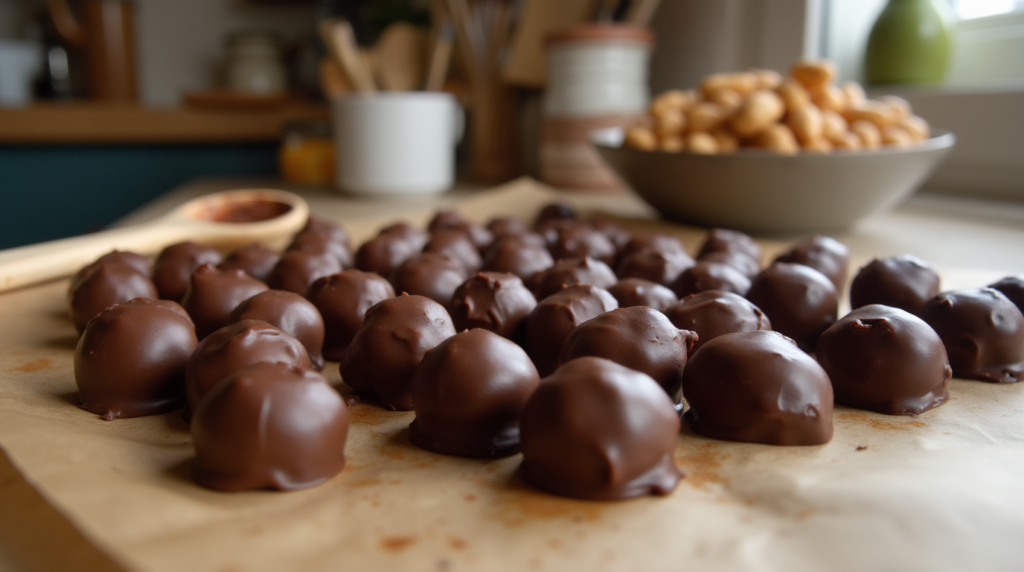
Step 4 – Cooling and Setting
Place the chocolate-covered peanuts in the refrigerator for 15–20 minutes. This step is crucial as it allows the chocolate to set firmly, resulting in a snack with an ideal, crisp texture.
How to Make Peanut Clusters in the Microwave
For a quick version of Chocolate Covered Peanuts, you can use the microwave method. After preparing and drying the peanuts, place them in a microwave-safe bowl with your melted chocolate. Microwave in short bursts of 10 seconds, stirring in between until the mixture is fully combined. Then, spread the mixture on a lined tray and chill until set. This fast method produces easy chocolate peanut clusters that are perfect for a last-minute treat.
The Secret to Perfect Chocolate Covered Peanuts
Achieving the ideal texture for Chocolate Covered Peanuts requires attention to detail. To avoid sogginess, always ensure your peanuts are completely dry before dipping. Work swiftly with the melted chocolate to avoid thick, uneven coatings, and refrigerate immediately after coating. These steps help secure a smooth chocolate finish and extend the snack’s longevity.
Flavor Variations for Chocolate Covered Peanuts
Experiment with exciting flavor variations to elevate your Chocolate Covered Peanuts:
- Caramel Drizzle: Add a rich caramel drizzle over the finished clusters.
- Sea Salt: A sprinkle of sea salt enhances the sweet and salty interplay.
- Chili Kick: For a bold twist, add a pinch of chili powder to the melted chocolate.
- Nutty Crunch: Top the clusters with crushed nuts for additional texture and flavor.
These gourmet flavor options allow you to customize your snack to suit any taste preference.
Gourmet and Artisanal Chocolate Covered Peanuts
Luxury brands have embraced Chocolate Covered Peanuts, creating artisanal versions with organic ingredients and exotic chocolate blends. These premium snacks are crafted with precision, ensuring a refined taste experience that is perfect for special occasions or as a unique gift. Artisanal varieties often feature innovative flavor pairings and elegant packaging that elevate the snack to gourmet status.
Alexander’s Chocolate-Covered Peanuts
One of the most celebrated brands in this category is Alexander’s Chocolate-Covered Peanuts. Known for their rich flavor and perfect texture, they have set the benchmark for chocolate peanut clusters in the gourmet snack industry. Their commitment to quality and innovation makes them a favorite among connoisseurs.
Storing and Preserving Chocolate Covered Peanuts
Proper storage is essential to maintain the crispness of your Chocolate Covered Peanuts. Keep them in an airtight container in a cool, dry place, ideally in the refrigerator—but avoid long-term storage as condensation may occur. For optimal flavor and crunch, consume these treats within a few days of preparation.
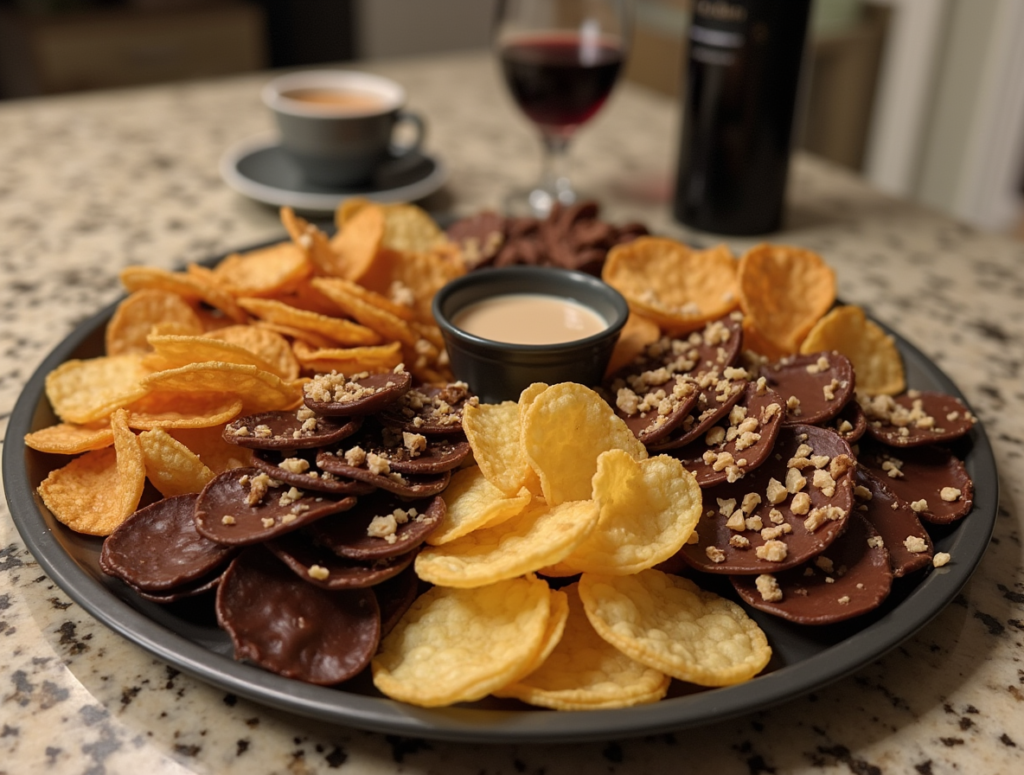
Pairing Chocolate Covered Peanuts with Other Foods
Enhance your snacking experience by pairing Chocolate Covered Peanuts with complementary foods:
- Coffee Pairing: A robust cup of coffee can accentuate the rich chocolate flavor.
- Dessert Platter: Combine them with other gourmet snacks for a diversified tasting experience.
- Wine or Beer: Pair with a dessert wine or craft beer to bring out the nuanced flavors.
These pairings create a sophisticated gourmet snack experience that enhances both flavor and presentation.
Are Chocolate Covered Peanuts Healthy?
While Chocolate Covered Peanuts are undeniably indulgent, they offer a blend of protein and healthy fats from the peanuts. However, due to the added chocolate and sugars, they are calorie-dense. Enjoy them in moderation as an occasional treat. For a healthier alternative, opt for dark chocolate, which provides antioxidants along with its rich taste.
DIY Gift Ideas: Chocolate Covered Peanuts as a Present
Homemade Chocolate Covered Peanuts make excellent gifts. Package them in decorative tins, glass jars, or cellophane bags tied with a ribbon. Personalize the gift with custom labels and notes, making it perfect for holidays, birthdays, or as a thoughtful gesture. These edible gifts are both unique and delicious, sure to impress any recipient.
Common Mistakes to Avoid When Making Chocolate Covered Peanuts
To ensure your Chocolate Covered Peanuts turn out perfectly every time, avoid these common pitfalls:
- Insufficient Drying: Ensure peanuts are completely dry to prevent sogginess.
- Improper Tempering: Melt the chocolate slowly to avoid a grainy texture.
- Overcoating: Too thick a layer can mask the natural flavor of the peanuts.
- Inadequate Cooling: Always refrigerate immediately after coating for optimal crispness.
Being mindful of these snack preparation tips will help you consistently produce a gourmet treat.
FAQs About Chocolate Covered Peanuts
What’s the best type of chocolate for coating peanuts?
Premium dark, milk, or white chocolate all work well—choose based on your taste preference.
Why is my chocolate coating grainy?
Improper tempering or overheating the chocolate can lead to a grainy texture.
How long do chocolate covered peanuts last?
Stored in an airtight container, they can stay fresh and crunchy for several days.
Can I use flavored peanuts for coating?
Yes, experimenting with flavored or lightly salted peanuts can add unique twists to your recipe.
What’s the best way to store chocolate covered peanuts?
Keep them in an airtight container in a cool, dry place, preferably in the refrigerator, to maintain their crispness.
Fun Ways to Serve Chocolate Covered Peanuts
Get creative with your presentation of Chocolate Covered Peanuts. Arrange them on elegant dessert platters or in small paper bags at parties. For an interactive twist, set up a snack station where guests can add extra toppings like a drizzle of caramel or a sprinkle of sea salt. Their versatile nature makes them perfect for both casual gatherings and upscale events.
The Best Chocolate Covered Peanut Brands to Buy
If you prefer ready-made options, several gourmet brands offer artisanal Chocolate Covered Peanuts. These store-bought versions are crafted with premium ingredients and innovative techniques, ensuring a consistently high-quality snack. Look for reviews and recommendations to find the best snack brands that deliver exceptional flavor and texture.
Chocolate Covered Peanuts Around the World
This innovative treat has inspired international variations, with different cultures adding their own twist. From unique flavor infusions to creative presentations, global dessert ideas continue to push the boundaries of what this sweet and salty snack can be. Exploring these international takes can provide fresh inspiration for your own culinary experiments.
Creative Desserts Using Chocolate Covered Peanuts
Expand your dessert repertoire by incorporating Chocolate Covered Peanuts into other recipes. Use them as an ice cream topping, mix them into brownie batter for extra crunch, or sprinkle them over cakes for a gourmet finish. Their unique texture and flavor make them a versatile ingredient in modern baking and creative dessert presentations.
Conclusion: Why Chocolate Covered Peanuts Are a Must-Try Snack!
In conclusion, Chocolate Covered Peanuts are a standout treat that marries the best of both worlds—crunchy, roasted peanuts enveloped in a smooth, decadent chocolate coating. Their perfect balance of flavors and textures makes them an irresistible sweet and salty snack, ideal for any occasion. Whether you make them at home with our detailed recipe, explore gourmet store-bought options, or experiment with creative flavor variations, these treats offer a unique indulgence that every food lover should experience.
Embrace the culinary creativity behind this gourmet snack and discover why Chocolate Covered Potato Chips are truly a must-try treat. Enjoy the journey, share with friends, and elevate your snack game with this innovative and delectable delight!