
Confectionery coating is a versatile ingredient often confused with real chocolate, yet prized by bakers and candy-makers for its easy handling and glossy finish.
If you want to create cake pops, dip strawberries, or design candy molds without the hassle of tempering chocolate, this alternative may be your secret weapon. Below, we’ll explore exactly what it is, how it differs from chocolate, the best melting methods, and a range of recipes and tips to help you master its sweet potential.
Dive in to discover how confectionery coating can transform your homemade treats!
What is Confectionery Coating?
Sometimes called candy coating, candy melts, or compound coating, this sweet, meltable product is designed for dipping, drizzling, or molding. Unlike real chocolate, it typically lacks cocoa butter.
Instead, it substitutes vegetable fats like palm kernel oil, making it simpler to handle because you don’t have to temper it as meticulously.
- Main Features: Ready to melt, sets into a firm shell, doesn’t require precise temperature control.
- Purpose: Provide a decorative, glossy coating on candies, cake pops, cookies, or fruit without the complexities of pure chocolate.
Confectionery Coating vs. Real Chocolate
Key Differences and When to Use Each
- Cocoa Butter vs. Vegetable Fats: Real chocolate is made with cocoa butter. However, an alternative product uses different oils for a stable, easy-to-melt result.
- Tempering Requirements: True chocolate requires tempering to achieve shine and snap. This alternative sets easily at room temperature, avoiding that extra step.
- Flavor & Texture: This alternative has a sweeter, slightly artificial taste, while pure chocolate tastes richer. Still, it’s prized for convenience and consistent results.
When to Use:
- Confectionery coating suits fast, fuss-free candy-making or decorative drizzles.
- Real chocolate is best for gourmet truffles, intense cocoa flavor, or higher-end desserts.
Types of Confectionery Coating
White, Milk, Dark, and Colored Coatings
- White Coating: Mild, vanilla-like flavor. Often tinted with oil-based colors for pastel or bright hues.
- Milk Coating: Mimics milk chocolate’s sweetness but typically lacks the deep cocoa note.
- Dark Coating: More chocolate-like, though still not genuine dark chocolate. Delivers a richer finish.
- Colored Varieties: Pink, green, blue, etc. for festive decorating—common in candy melts.
Pro Tip: Always verify labeling to ensure you buy the right type (milk vs. dark vs. white) for your recipe needs. Many are specifically labeled as “candy melts.”
How Confectionery Coating is Made
Ingredients and Processing Methods
This alternative typically blends sugar, milk solids (for milk or white versions), and vegetable fats (palm kernel, coconut, or similar) in place of cocoa butter. Flavorings might include cocoa powder or extracts to match chocolate’s taste. Once mixed, the product undergoes refining and cooling to create wafers or blocks. This differs from real chocolate, which must contain cocoa butter to be legally classified as chocolate.
Key Points:
- Cheaper fats lower production cost vs. cocoa butter.
- Non-chocolate oils reduce complexity in melting and setting.
- Additional emulsifiers ensure smoother melts.
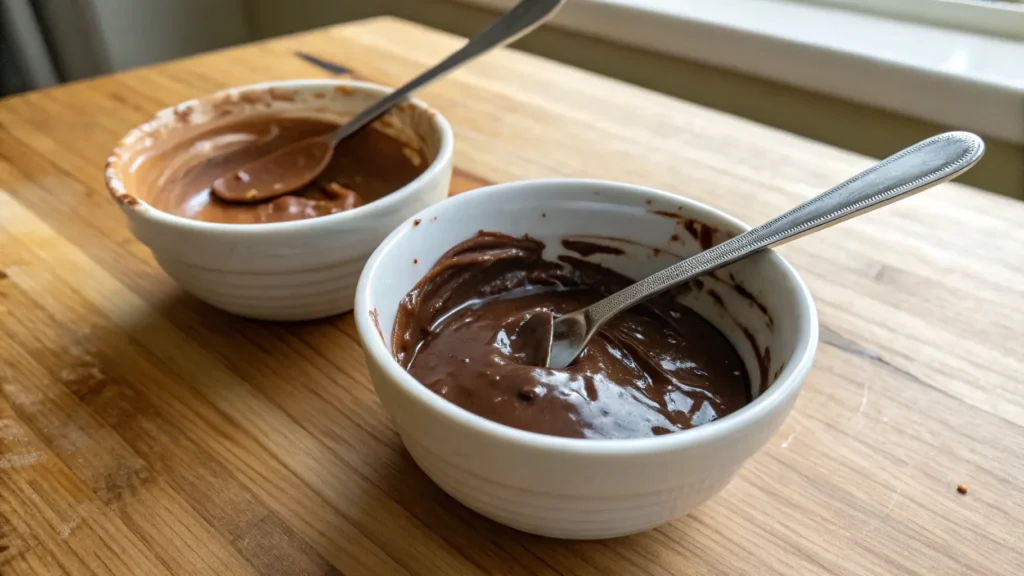
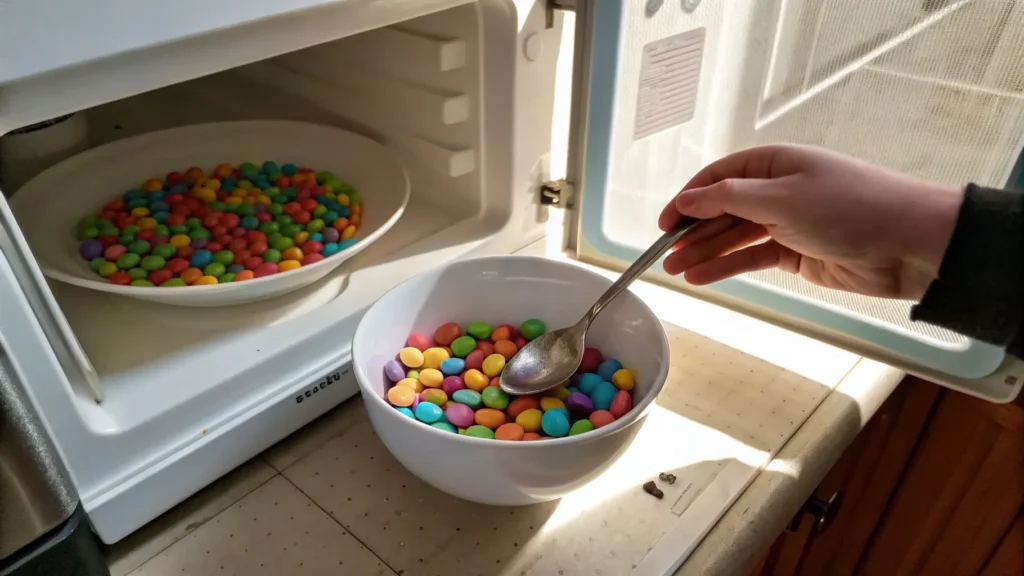
Best Ways to Melt Confectionery Coating
Microwave vs. Double Boiler
- Microwave Method: Quick and straightforward. Heat in short bursts (~15-30 seconds), stir often to avoid scorching. If lumps remain, keep stirring—residual heat may finish the job.
- Double Boiler Method: Offers slower, gentler heat. Place coating in a heatproof bowl over simmering water. Stir until fully melted, then remove from heat promptly.
Potential Pitfalls:
- Overheating can cause thickening or burnt tastes.
- Adding water directly can seize the mixture; use oil-based or cocoa butter if thinning is required.
How to Make Chocolate Coating That Hardens
Achieving the Perfect Glossy and Crisp Finish
Confectionery coating is designed to set firm without traditional tempering. For extra snap or sheen:
- Avoid Excess Heat: Overcooking damages the fats. Keep melting temperature moderate.
- Work Quickly: Once melted, apply or dip your treats. Leaving it on heat too long might degrade texture.
- Cool Room: Let coated items rest in a cool space (about 65–70°F) for a neat finish. Refrigeration can speed setting but watch for condensation.
Confectionery Coating Recipe
DIY Recipe for Homemade Confectionery Coating
Ingredients (Yields ~2 cups):
- 2 cups powdered sugar
- ½ cup unsweetened cocoa powder (for a “chocolate” version)
- ½ cup vegetable oil (coconut or palm kernel recommended)
- 1 tsp vanilla extract (for flavor)
- Pinch of salt
Instructions:
- Mix Dry: In a bowl, combine powdered sugar, cocoa powder, and salt.
- Heat Oil: Warm vegetable oil gently (microwave ~30 seconds or in a small saucepan).
- Blend: Stir the oil into dry ingredients, whisking until smooth.
- Melt & Adjust: If lumps form, microwave in short increments, stirring well. Add more oil if needed for thinner consistency.
- Use Immediately: Dip or drizzle. Once cooled, your homemade coating will firm up similarly to store-bought alternatives.
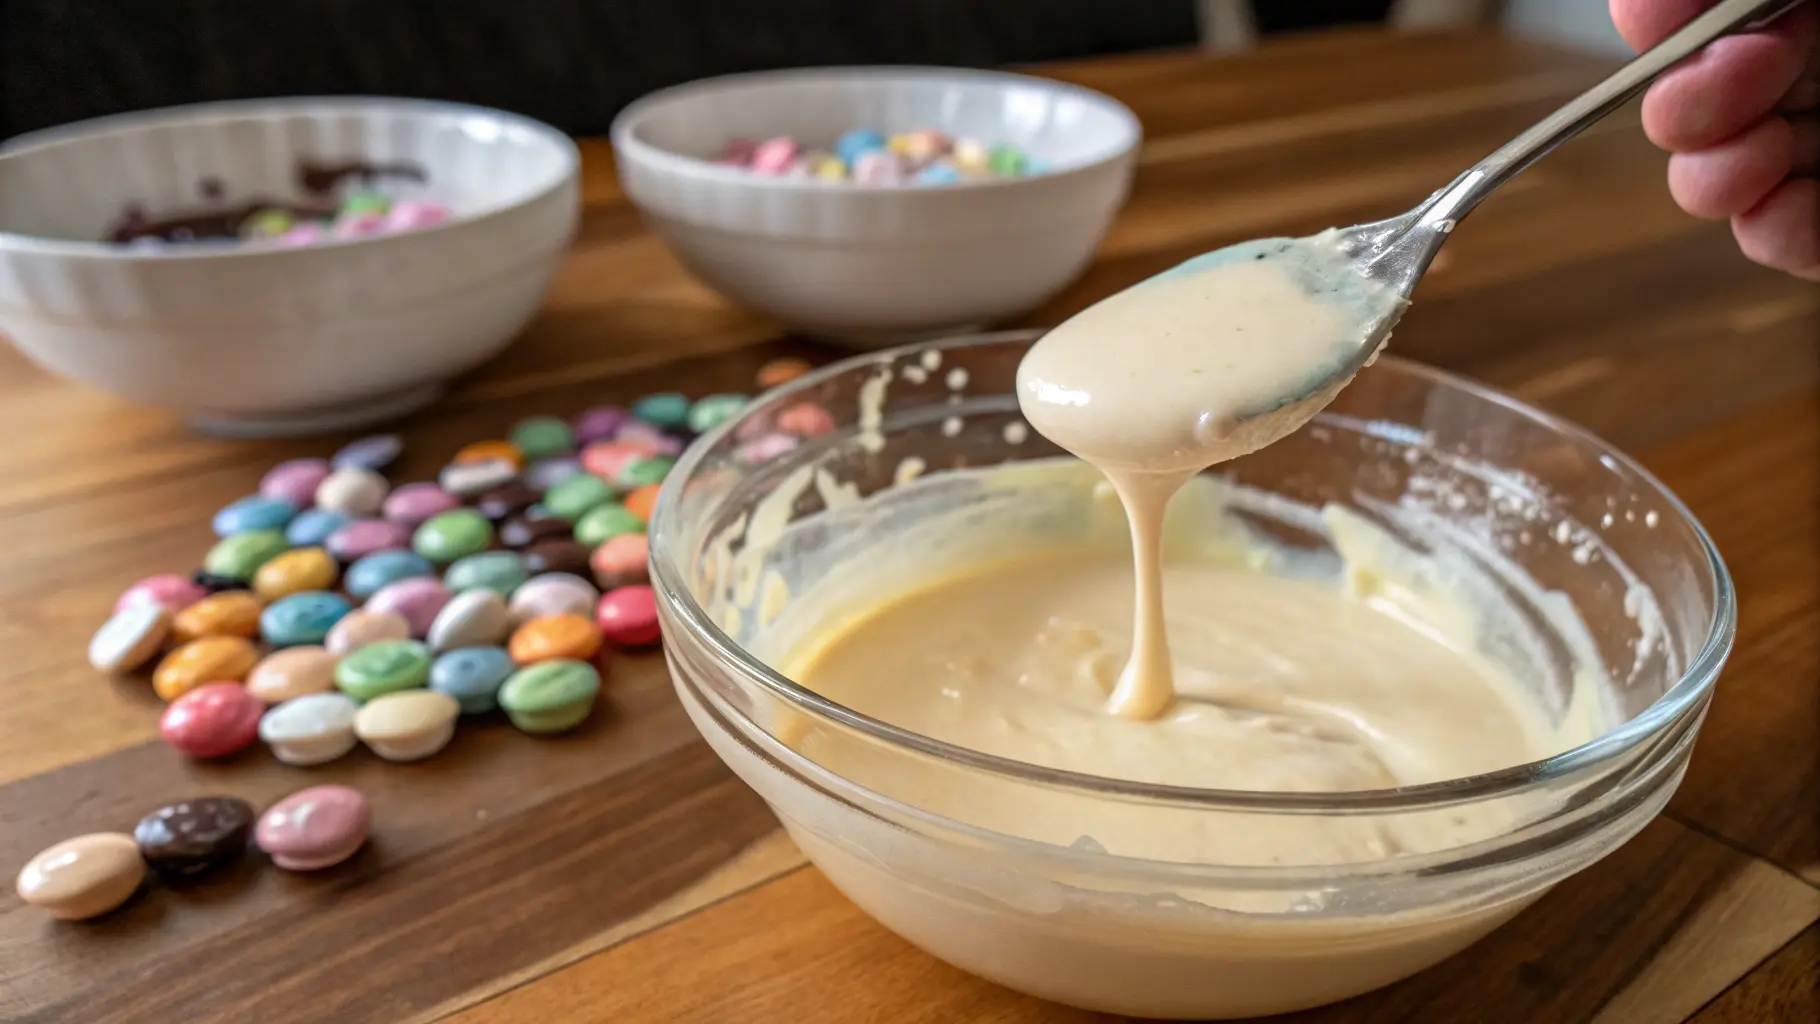
White Confectionery Coating Recipe
How to Make and Use It for Decorating
White confectionery coating is ideal for wedding-themed desserts or pastel cake pops. Try this quick recipe:
Ingredients:
- 2 cups powdered sugar
- ½ cup refined coconut oil (solid or semi-solid)
- ½ tsp clear vanilla or almond extract (optional)
- Pinch of salt
Steps:
- Soften Coconut Oil: Gently melt ~30 seconds, ensuring it doesn’t get too hot.
- Combine with Sugar: Stir in powdered sugar, salt, and extract.
- Heat & Stir: Alternate short heating bursts and whisking until lumps vanish.
- Coloring (Optional): Add oil-based dye to create custom hues.
Use: Dip strawberries, pipe drizzle on cookies, or coat cake pops. Hardens upon cooling.
Confectionery Coating Chocolate
How It Differs from Regular Chocolate
This chocolate alternative is essentially a cocoa-flavored compound using alternative fats. It looks like chocolate, often tastes similar, but lacks cocoa butter. This omission allows it to:
- Melt easily without complicated tempering steps.
- Set quickly at room temperature, though the flavor might be less deep than pure chocolate.
- Remain stable across diverse temperature ranges, simplifying shipping or candy-making in warmer climates.
Coating Chocolate vs. Melting Chocolate
What’s the Difference and When to Use Each?
- Coating Chocolate (Confectionery Coating): Typically used for candy decorations, dipping, or decorative drizzle. It sets into a firm shell with minimal fuss. Great for novices or volume production.
- Melting Chocolate (Real Chocolate Bars/Chips): Suited for recipes prioritizing chocolate’s authentic taste. Requires careful heating or tempering if you want that professional shine and snap.
Choice: If flavor purity is key—go real chocolate. If a stable finish or easy usage is your priority, choose confectionery coating.
Tips for Working with Confectionery Coating
How to Avoid Clumping and Overheating
- Short Microwave Bursts: Heat in 15–20 second intervals, stirring often.
- Low Heat on Double Boiler: Keep water just simmering, not boiling. Steam or direct water can seize the coating.
- Add Paramount Crystals or Vegetable Oil: If thickening occurs, a small amount helps regain fluid consistency.
Extra Safeguard: Ensure bowls and utensils are completely dry. Any water can make your coating lumpy or grainy.
Uses for Confectionery Coating
Dipping, Drizzling, and Decorating
Some top applications:
- Cake Pops: Dip them for a smooth shell; decorate with sprinkles while still wet.
- Strawberries & Fruit: The quick-setting nature prevents drips.
- Pretzels or Cookies: Perfect for holiday treat boxes—drizzle lines or half-dip.
- Candy Molds: Pour melted coating into silicone molds for shaped candies.
Note: The final hardened shell easily packages or ships without the meltdown typical of real chocolate.
How to Color Confectionery Coating
The Right Type of Food Coloring to Use
Oil-based or candy colorings are essential since water-based dyes can cause clumping in the mixture. Powdered candy color also works, but always add color gradually.
- Melt the coating
- Stir in the coloring
- Continue blending until the desired shade emerges.
Tip: Avoid standard gel or liquid color—these contain water, risking your coating’s consistency.
How to Store Confectionery Coating
Keeping It Fresh and Ready to Use
- Cool, Dry Storage: Target 60–70°F in a sealed container or a cupboard. Avoid direct sunlight or heat.
- Avoid Fridge or Freezer: Unless your climate is scorching. Rapid temperature shifts can cause blooming or condensation.
- Re-Seal Tightly: Keep unused coating in ziplock bags or in the original packaging, taped securely.
Shelf Life: Typically 12–18 months if unopened and stored properly. Opened coatings stay good for several months, though fresh is best for optimum color and taste.
Common Mistakes When Using Confectionery Coating
- Using Water-Based Dye: Causes the coating to clump and seize.
- Overheating: Prolonged microwaving or direct high heat breaks down fats, yielding grainy texture.
- Expecting Real Chocolate Flavor: While it can taste delicious, it’s not pure chocolate—manage expectations.
- Skipping Stirring: Regular stirring prevents hot spots and scorching.
Creative Dessert Ideas Using Confectionery Coating
Fun and Delicious Ways to Use It
- Marbled Bark: Drizzle contrasting colors of coating on a parchment-lined tray, swirl with a toothpick, top with nuts or candy pieces.
- Drip Cakes: Achieve a smooth “drip” effect around a frosted cake’s edges.
- Fudge Layer: Combine melted coating with condensed milk for a quick microwave fudge base.
Pro Tip: This coating sets quickly, so gather decorations beforehand to press sprinkles or nuts into place.
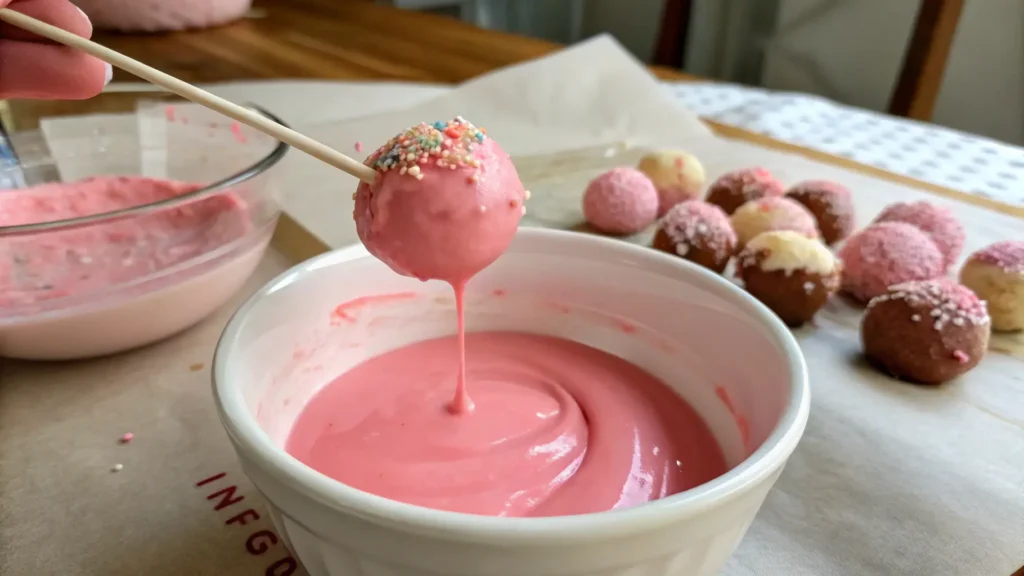
Confectionery Coating for Cake Pops and Candies
Perfecting the Finish
This coating sets quickly, so gather decorations beforehand to press sprinkles or nuts into place.
- Chill formed cake balls prior to dipping.
- Gently tap excess coating off the pop’s base to avoid lumps.
- Let them stand upright in a foam block until fully hardened.
Candies: For molded chocolates, ensure the coating is fluid, then fill molds carefully. Tap molds to release air bubbles.
Is Confectionery Coating Vegan?
Checking Ingredients and Alternatives
Standard confectionery coating may contain milk solids or other non-vegan components. However, certain brands produce vegan-friendly versions free of dairy. Always read ingredient lists:
- Dairy-Free: Avoid “milk powder” or “milkfat.”
- Palm Oil Concerns: Some use palm oil from questionable sources, so check for sustainable certifications.
- Cocoa Butter (If any) might still appear in partial amounts, but that doesn’t necessarily mean it’s vegan—milk derivatives could lurk elsewhere.
FAQs
What is confectionery made of?
It often blends sugar, flavorings, and fats like palm kernel or coconut oil. Some incorporate cocoa powder for a “chocolatey” taste.
How to melt confectionery coating?
Short bursts in the microwave or in a double boiler, stirring frequently to prevent scorching.
What is the difference between chocolate and confectioners coating?
Real chocolate uses cocoa butter, while confectionery coating uses alternative fats, making it simpler to handle.
Is white confectionery coating chocolate?
No, it lacks cocoa butter. It’s basically sweet, white candy melts with vanilla or similar flavor.
What is the difference between chocolate and confectionery?
“Chocolate” implies cocoa butter content, while candy melts rely on vegetable oils, not cocoa butter.
Is coating chocolate and couverture the same?
No. Couverture chocolate is premium chocolate with high cocoa butter content, needing precise tempering. Confectionery coating is a simpler product.
Is candy coating the same as candy melts?
Yes, both terms apply to sweet, meltable wafers often sold for dipping or molding.
Is almond bark and candy coating the same thing?
They’re comparable. Almond bark is a type of confectionery coating typically used for melting and dipping.
Can I use chocolate chips instead of candy coating?
You can, but chips require careful melting and possibly tempering. They won’t set as reliably if used in place of this alternative.
Can you use toll house chocolate chips for dipping?
They can work, but chip sets differ from candy melts. You may need to add shortening or oil to maintain fluid consistency.
The Science Behind Confectionery Coating’s Texture
Why It Sets Differently from Chocolate
In confectionery coating, the lack of cocoa butter lowers or removes the need for complex tempering. Alternative fats solidify at room temperature, forming a stable shell. Hence, it easily melts and resets, making it a favorite for candy crafts and quick dessert finishes.
Extra Fact: Real chocolate’s crystalline cocoa butter structure demands strict temperatures. Coating formulations skip that headache.
Final Thoughts – Why Confectionery Coating Is a Must-Have
Confectionery coating invites creativity in the kitchen: it’s beginner-friendly, fuss-free, and crucial for bright colors or consistent candy-making.
While purists still favor real chocolate for its complex taste, the convenience, reliability, and wide color selection of confectionery coating can’t be denied.
Whether you’re dipping cake pops, drizzling fancy designs on cookies, or whipping up holiday treats with kids, this sweet, simple ingredient promises polished, professional-looking results without chocolate’s tempering demands.
For creative ideas on how to incorporate it into your recipes, check out our plum milk guide.
Keep a supply handy, follow proper melting tips, and let your imagination run wild in all your dessert projects.